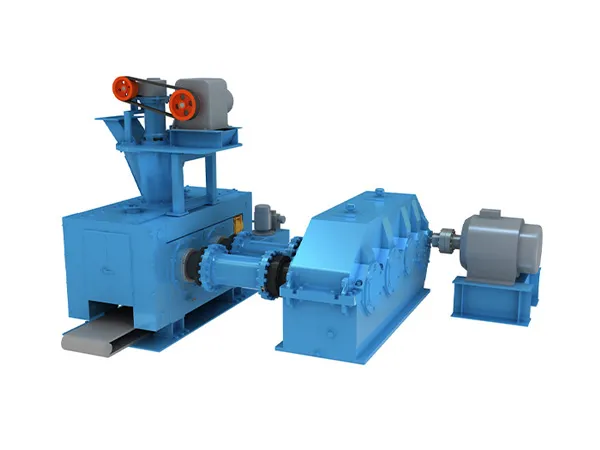
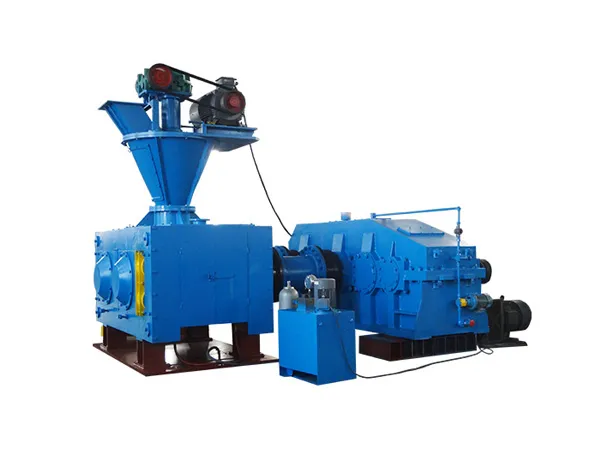
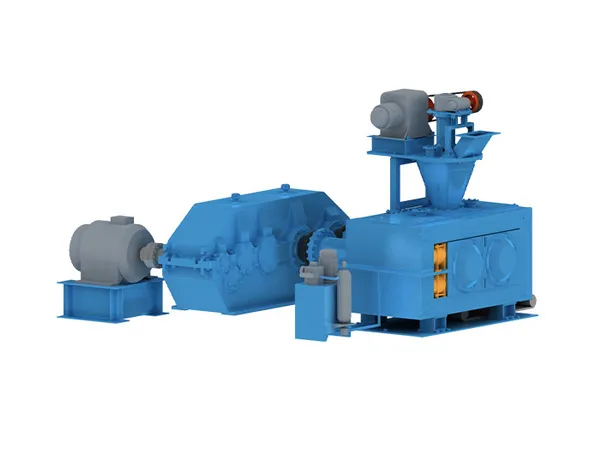
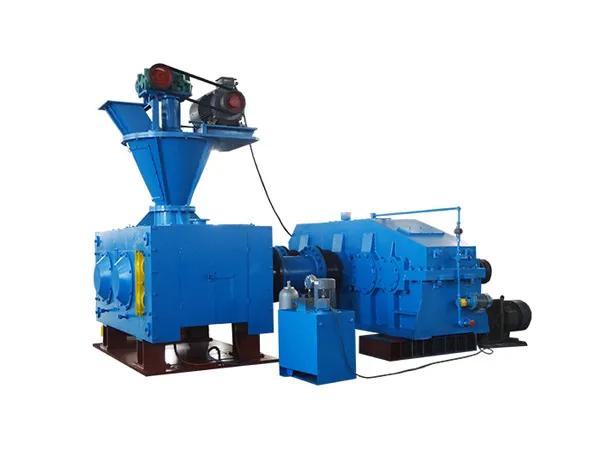
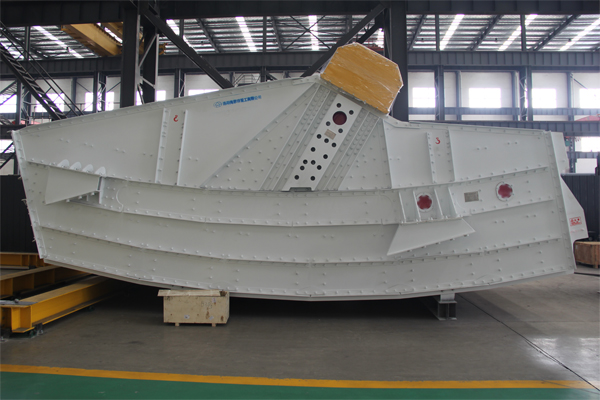
Reducing the noise generated by a mandíbula is crucial for worker safety, environmental regulations, and community relations. Jaw crushers are inherently noisy due to the high-impact nature of rock crushing. Here’s a breakdown of methods to reduce jaw crusher noise, categorized for clarity.

How To Reduce The Noise of Jaw Crusher

jaw crusher

1. Source Control (Modifying the Crusher/Process):

Optimize Feed:

Consistent Feed Rate: Avoid large, sudden drops of material. A steady, choked feed (keeping the crushing chamber relatively full) can sometimes dampen impact noise slightly, although it might increase overall operational noise. Experiment to find the optimal balance.

especulación: Pre-screen the feed material to remove fines that don’t need crushing. This reduces the amount of material going through and can lower noise.

Proper Maintenance:

Lubricación: Ensure all bearings and moving parts are adequately lubricated to reduce mechanical noise.

Tighten Fasteners: Loose bolts and components can vibrate excessively, creating noise. Regularly check and tighten all fasteners.

Replace Worn Parts: Worn jaw plates, aspectos, and drive components can operate less efficiently and generate more noise. Replace them promptly.

Balance Rotating Parts: Ensure flywheels and drive components are properly balanced to minimize vibration.

Operational Settings: Ensure the crusher is operating at the recommended speed and Closed Side Setting (CSS) for the material being processed. Incorrect settings can increase stress and noise.

2. Path Control (Blocking or Absorbing Noise Transmission):

Enclosures:

Full Enclosure: Build a soundproof or sound-reducing enclosure around the crusher itself. This is often the most effective method but also the most expensive.

Considerations include:

materiales: Use heavy materials with good sound transmission loss (p.ej., concreto, thick steel) combined with internal sound absorption materials (p.ej., mineral wool, acoustic foam).

Ventilación: Enclosures require adequate ventilation systems, which themselves need silencers to prevent noise leakage.

For more detailed information on how to reduce the noise of jaw crusher, por favor haga clic aquí: https://www.yd-crusher.com/a/news/how-to-reduce-the-noise-of-jaw-crusher.html

UNA mandíbula is a type of heavy-duty machinery commonly used in mining, construcción, and demolition industries for reducing large rocks into smaller, more manageable sizes. Known for its simplicity, durabilidad, and high efficiency, the jaw crusher operates by compressing material between a fixed jaw and a moving jaw. This mechanical pressure breaks down the material, making it ideal for primary crushing applications.The cost of a jaw crusher can vary widely depending on several factors, including size, capacidad, marca, y caracteristicas.

Jaw Crusher Cost

jaw crusher

Here are the main factors influencing the cost of a jaw crusher:

Tamaño y capacidad: This is the biggest factor.

Feed Opening Size: Larger openings (p.ej., 42″x30″, 50″x60″) can take bigger rocks and process more material.

Throughput (Tons Per Hour – Tph): Higher capacity crushers cost significantly more.

Small/Lab Scale: Very small units for lab testing might cost a few thousand to $15,000.

Small/Medium: Crushers for smaller operations, reciclaje, or contractors might range from $30,000 a $250,000.

Medium/Large: Standard quarry or mining sizes can range from $150,000 a $800,000+.

Very Large/Primary: The biggest units for high-volume mines can easily exceed $1,000,000 and go up to several million dollars.

New vs. Used:

Nuevo: Highest cost, comes with a warranty, latest technology, and manufacturer support.

Used: Significantly cheaper (often 30-70% of new price depending on condition and age), but comes with risks (úsese y tírese, unknown history, potential for higher maintenance, no warranty).

For more detailed information about how much a jaw crusher costs, por favor haga clic aquí: https://www.yd-crusher.com/a/news/jaw-crusher-cost.html

Customized desk and chair sets offer a perfect blend of comfort, functionality, and personalized style. Designed to meet the unique needs of users across various settings—such as schools, oficinas, training centers, and home workspaces—these tailored furniture solutions provide ergonomic support, efficient use of space, and a cohesive aesthetic.Customizing a desk and chair set allows you to create a workspace that perfectly fits your needs, style, and ergonomic requirements.

Customized desk and chair sets

desk and chair sets

1. Define Your Goals & Needs (Fase de planificación):

Objetivo: What will you primarily use the desk/chair for? (Trabajar, gaming, studying, crafting, art?) This influences size, características, and durability needs.

Ergonomics: This is crucial for comfort and health. Consider:

Ideal Desk Height: Elbows at a 90-degree angle when typing/writing.

Ideal Chair Height: Feet flat on the floor, knees at a 90-degree angle.

Chair Support: Lumbar support, adjustable armrests, seat depth.

Monitor Position: Top of the screen at or slightly below eye level.

Space: Measure your available space accurately. Consider room layout and clearance for the chair.

Estética: What style are you aiming for? (Modern, rustic, industrial, minimalist?) What colors, materiales, and finishes do you prefer?

Funcionalidad: What features do you need?

Desk: Drawers, estantería, cable management, keyboard tray, specific surface area, sit-stand capability?

Chair: Ajustabilidad (altura, brazos, back tilt, lumbar), girar, ruedas (type appropriate for your floor), headrest?

For more detailed information on how to customize the table and chair set, por favor haga clic aquí: https://www.aoyangschoolfurniture.com/a/news/customized-desk-and-chair-sets.html


While both steel and aluminum are used in the construction of tunnel lining trolleys, steel is generally considered more durable for this demanding application.

Differences between steel and aluminum tunnel lining trolleys

tunnel lining trolleys

Acero:

Higher Strength and Stiffness: Steel possesses significantly higher tensile and yield strength compared to aluminum. This allows steel trolleys to withstand the substantial loads and pressures exerted by wet concrete during the lining process without excessive deformation or failure. The inherent stiffness of steel also contributes to maintaining the precise shape of the tunnel lining formwork.

Better Resistance to Abrasion and Impact: Tunnel construction environments are often abrasive, with exposure to concrete, rock, y otros materiales. Steel offers superior resistance to wear and tear from abrasion and impacts, prolonging the lifespan of the trolley.

For more detailed information on the difference between steel tunnel lining trolleys and aluminum tunnel lining trolleys, por favor haga clic para visitar: https://www.gf-bridge-tunnel.com/a/blog/differences-between-steel-and-aluminum-tunnel-lining-trolleys.html

Reducing noise from tunnel lining equipment is crucial for worker health and safety, environmental compliance, and maintaining good relations with nearby communities. Noise in tunnels is often amplified due to the confined space and hard, reflective surfaces. Here’s a breakdown of strategies, following the hierarchy of controls (elimination/substitution, engineering controls, administrative controls, EPP).

Cómo reducir el ruido del equipo de revestimiento de túneles

tunnel lining equipment

1. Source Control (Elimination, Substitution & Engineering Modifications): This is the most effective approach.

Equipment Selection (Procurement):

Specify Low-Noise Equipment: When purchasing or renting equipment (TBMs, segment erectors, grout pumps, ventilation fans, locomotives), specify maximum noise emission levels in the tender documents. Request noise data from manufacturers (sound power levels).

Choose Quieter Technologies: Opt for electric or hydraulic systems over noisier pneumatic ones where feasible. Use variable speed drives (VSDs) for fans and pumps so they only run as fast as needed. Consider modern, quieter engine designs for diesel equipment.

Engineering Modifications to Existing Equipment:

Engine/Motor Enclosures: Install well-sealed acoustic enclosures around noisy engines, motors, and pumps (p.ej., grout pumps, generadores). Ensure adequate ventilation for cooling, often requiring silenced air inlets and outlets.

Silencers/Mufflers: Fit high-performance silencers to engine exhausts and ventilation fan inlets/outlets. Ensure they are correctly sized and maintained.

Vibration Isolation: Mount noisy components (engines, zapatillas, cajas de cambios) on vibration isolators (rubber mounts, muelles) to prevent vibration from transferring into the equipment structure or tunnel lining, which then radiates noise.

Hydraulic System Noise: Use low-noise hydraulic pumps, accumulators to dampen pulsations, and flexible hoses instead of rigid pipes where possible to reduce vibration transmission.

Conveyor Systems: Use low-noise rollers, belt materials, and ensure proper alignment and tension to minimize noise. Enclose drive units.

Grouting Equipment: Use pulsation dampeners on pumps. Enclose mixers and pumps if possible.

Segment Erectors: Ensure smooth hydraulic operation. Maintain components to prevent jerky movements or impacts.

Damping Materials: Apply damping materials (p.ej., constrained layer damping) to large vibrating panels on equipment (like enclosures or guards) to reduce noise radiation.

More detailed information on how to reduce noise from tunnel lining trolleys can be found at: https://www.gf-bridge-tunnel.com/a/blog/how-to-reduce-tunnel-lining-equipment-noise.html

Personalización de un carro de revestimiento de túneles (también conocido como carro de encofrado o pórtico) es un proceso de ingeniería complejo, Esencial para garantizar que el carro se adapte perfectamente a los requisitos específicos de un proyecto de túnel en particular.. Estándar, Los carros disponibles en el mercado rara vez se adaptan a geometrías de túneles únicas., condiciones geologicas, o metodologías de construcción.

Carro de revestimiento de túnel personalizado

tunnel lining trolley

1. Comprender la necesidad de personalización (los “Por qué”)

La personalización está impulsada por parámetros específicos del proyecto.:

Geometría del túnel:

Forma: Circular, herradura, oval, rectangular, perfiles personalizados.

Tamaño: Dimensiones específicas de diámetro o ancho/alto.

Gradiente: Pendientes o descensos en el túnel.

Curvas: Curvas horizontales o verticales que requieren carros articulados o adaptables.

Diseño de revestimiento:

Longitud del segmento: La longitud del hormigón vertido en cada ciclo determina la longitud del carro..

Espesor del Concreto: Afecta el peso que debe soportar el encofrado.

Reforzamiento: La complejidad de las jaulas de barras de refuerzo puede influir en el diseño y el acceso del encofrado.

Bloqueos & Insertos: Necesidad de vacantes (p.ej., para cruces, ventilación, servicios) requiere modificaciones específicas del encofrado.

Condiciones geológicas:

La presión del suelo podría requerir diseños estructurales más fuertes o sistemas de anclaje específicos.

Especificaciones de hormigón:

Método de vertido: El hormigón bombeado requiere puntos de integración para tuberías (líneas resbaladizas).

Necesidades de vibración: Tipo, cuando la precisión de funcionamiento del rodamiento no cumple los requisitos, y colocación de vibradores (interno/externo) debe ser especificado.

Requisitos de curado: Necesidad potencial de calefacción o aislamiento integrados.

Método de construcción & Cronograma:

Tiempo de ciclo: Requisitos para un desmontaje rápido, Moviente, y el ajuste influyen en la velocidad hidráulica, niveles de automatización, y eficiencia general del diseño.

Soltero vs.. Doble concha: Diferentes enfoques impactan el diseño del carro.

Integración: Necesita funcionar perfectamente con otros equipos (tuneladora, aplicadores impermeabilizantes, plantillas de barras de refuerzo).

Logística & Restricciones del sitio:

Limitaciones de transporte: Restricciones de tamaño y peso para llevar el carro dentro y dentro del túnel. A menudo requiere un diseño modular para facilitar el transporte y el montaje..

Para obtener información más detallada sobre cómo personalizar el carro de revestimiento de túneles, por favor haga clic aquí: https://www.gf-bridge-tunnel.com/a/blog/customized-tunnel-lining-trolley.html

Tunnel lining trolleys, also known as tunnel formwork systems or tunnel shuttering machines, are essential equipment used for in-situ concrete lining in tunnel construction. Depending on tunnel structure, tamaño, y métodos de construcción, tunnel lining trolleys can be classified into several types. These are large, mobile structures used inside tunnels to support the formwork for cast-in-place concrete linings or to install precast concrete segments.

Tunnel Lining Trolley Type

Tunnel lining trolleys

The primary categorization is based on the type of lining they are designed for:

Formwork Trolleys (for Cast-in-Place Concrete Lining):

These trolleys carry large sections of steel formwork. They position the formwork against the excavated tunnel profile, concrete is pumped behind it, and once the concrete cures sufficiently, the trolley lowers (strips) the formwork and moves forward (travels) to the next section.

Sub-types based on Formwork Configuration:

Full-Round Formwork Trolley: Carries formwork for the entire tunnel cross-section (invert, walls, and arch) allowing for a single pour. Complex and heavy, often used for circular or near-circular tunnels.

Arch (or Crown/Sidewall) Formwork Trolley: Carries formwork only for the upper arch and sidewall sections. This is used when the invert (piso) is cast separately first (often using simpler screeding or a dedicated invert form). This is very common for horseshoe or D-shaped tunnels.

Invert Formwork Trolley: Specifically designed to carry the formwork for casting the tunnel floor (invert). Often used in conjunction with an Arch Formwork Trolley.

Telescopic Formwork Trolley: The formwork sections are designed to retract inwards (like a telescope) after stripping. This allows the entire trolley to move forward through the previously cast lining section without needing extensive dismantling. This is the most common type for longer tunnels due to efficiency.

Non-Telescopic (Collapsible) Formwork Trolley: Sections may hinge or collapse, but might not fully telescope. Movement might require more clearance or partial dismantling. Less common for continuous tunnel drives.

Portal Formwork: While not strictly atrolleyin the travelling sense, specialized formwork systems are used at the tunnel entrances/exits (portals).

Tunnel lining trolleys

Segment Erector Trolleys (for Precast Concrete Segments):

These are used primarily in tunnels excavated by Tunnel Boring Machines (TBMs), although variations exist for conventional tunnels installing precast linings.

Their main function is to pick up precast concrete segments (delivered usually by multi-service vehicles or segment cars), rotate them to the correct orientation, and precisely place them to form a complete ring against the TBM’s shield or the previously installed ring.

More detailed information about tunnel lining trolley types can be found at: https://www.gf-bridge-tunnel.com/a/blog/tunnel-lining-trolleys-type.html

To prevent corrosion in estructuras de acero, a multi-faceted approach is essential, addressing design, material selection, surface preparation, and protective coatings.

Cómo prevenir la corrosión en estructuras de acero

steel structures

Consideraciones de diseño

Minimize Moisture Traps: Design details should prevent water accumulation and allow for drainage. Inclined surfaces, drainage holes, and avoiding sharp edges can help.

Ensure Adequate Ventilation: Promote air circulation around the steel structure to reduce humidity and the time of wetness. Seal box sections unless they are to be galvanized, in which case provide vent and drain holes.

Avoid Contact with Dissimilar Materials: Prevent or insulate contact between different metals (bimetallic connections) to avoid galvanic corrosion. similar, separate steel from timber using coatings or plastic sheets. Ensure proper concrete cover and quality to protect embedded steel.

Facilitate Coating Application and Maintenance: Design for easy access for applying and inspecting protective coatings.

Selección de materiales

Choose Appropriate Steel Grades: Consider using weathering steel (which forms a protective rust layer), acero inoxidable (for high corrosion resistance), or pre-coated steels like galvanized steel, galvalume steel, or pre-painted steel, depending on the environment.

Consider the Environment: Select materials and protection systems based on the corrosivity of the environment (p.ej., coastal, industrial, or interior).

Surface Preparation

Thorough Cleaning: Before applying any protective coating, the steel surface must be clean and free of rust, mill scale, aplicar vaselina, grasa, y otros contaminantes.

Methods include abrasive blast cleaning, power tool cleaning, and chemical cleaning (acid pickling). The chosen method depends on the initial condition of the steel and the requirements of the coating system.

Create a Suitable Surface Profile: Some coatings require a specific surface roughness (anchor profile) to ensure proper adhesion. Blast cleaning with angular abrasives creates this profile.

steel structures

Protective Coatings

Paint Systems: Applying multi-layer paint systems is a common method. These typically include a primer (often zinc-rich for cathodic protection or epoxy-based for adhesion and corrosion inhibition), an intermediate coat (to build thickness), and a topcoat (for weather resistance and aesthetics).

Metallic Coatings:

Hot-Dip Galvanizing: Immersing steel in molten zinc creates a robust, corrosion-resistant alloy layer bonded to the steel.

For more detailed information on how to prevent corrosion of steel structures, por favor visita: https://www.meichensteel.com/a/news/how-to-prevent-corrosion-in-steel-strcture.html

Reparación de grietas de soldadura en estructuras de acero Es una tarea crítica que requiere una planificación cuidadosa., ejecución, e inspección para garantizar que se restablezca la integridad estructural y que la grieta no regrese. Este es un trabajo para estructuras críticas y SIEMPRE debe ser realizado por soldadores calificados siguiendo procedimientos aprobados bajo la supervisión de ingenieros o inspectores experimentados..

Reparación de grietas en soldaduras de estructuras de acero

steel structures

1. Evaluación y planificación:

Seguridad ante todo: Implementar todas las precauciones de seguridad necesarias.. Esto incluye el EPP adecuado. (máscara de soldadura, guantes, cueros, respirador si es necesario), vigilancia contra incendios, ventilación, permisos de trabajo en caliente, Procedimientos de bloqueo/etiquetado si está cerca de maquinaria., y asegurar el área.

Identificar la grieta: Localice la grieta con precisión. Determinar su extensión total (longitud, profundidad, y si se extiende a través del espesor). Pruebas no destructivas (NDT) métodos como la prueba de partículas magnéticas (MONTE), Pruebas de líquidos penetrantes (PT), o Pruebas Ultrasónicas (Utah) A menudo son esenciales para encontrar las puntas de las grietas con precisión..

Determinar la causa (Crucial!): Este es el paso MÁS importante para prevenir la recurrencia.. ¿Por qué se formó la grieta??

Fatiga: Carga cíclica que conduce al inicio y propagación de grietas..

Alto estrés residual: Del proceso original de soldadura o fabricación..

Fragilización por hidrógeno: Hidrógeno atrapado en la soldadura/zona afectada por el calor (ZAT). A menudo causa agrietamiento retardado. (horas o días después de soldar).

Mala calidad de soldadura: Falta de fusión, falta de penetración, porosidad, inclusiones de escoria que actúan como elevadores de tensión.

Procedimiento de soldadura incorrecto: Consumibles incorrectos, Temperatura de precalentamiento/interpaso incorrecta, parámetros incorrectos.

Mal diseño de las juntas: Crea concentraciones de estrés..

Sobrecarga: La estructura fue sometida a cargas superiores a su capacidad de diseño..

Defectos del metal base: Laminaciones o inclusiones en el propio acero..

Consultar Códigos y Normas: Consulte los códigos de soldadura relevantes. (p.ej., Código de soldadura estructural AWS D1.1: acero, Eurocódigo 3, etc.) y especificaciones del proyecto para requisitos relacionados con la reparación de grietas..

Desarrollar un procedimiento de reparación: Basado en la causa, tipo de material, espesor, ubicación, y requisitos del código, una especificación detallada del procedimiento de soldadura (WPS) para la reparación debe ser desarrollado o seleccionado. Esto especifica:

Método de eliminación de grietas..

Detalles de preparación conjunta.

Proceso de soldadura (Marea, FCAW, Gawn, SIERRA).

Tipo y tamaño del metal de aportación..

Requisitos de precalentamiento.

Control de temperatura entre pasadas.

Tratamiento térmico posterior a la soldadura (Pwht) si es requerido.

Requisitos de END antes, durante, y después de la reparación.

Personal Calificado: Asegúrese de que los soldadores que realizan la reparación estén calificados de acuerdo con el WPS específico y los códigos relevantes.. Garantizar la participación de inspectores y técnicos de END calificados.

2. Ejecución de reparación:

steel structures

Eliminación de grietas: toda la grieta, incluyendo sus consejos, debe ser eliminado completamente. Esto normalmente se hace por:

ranurado: Ranurado por arco de carbón y aire (POOH) Es común y eficiente, pero requiere cuidado de no introducir exceso de carbono en el metal base. (generalmente seguido de molienda). Ranurado por arco de plasma (PÁGINA) es otra opcion.

Molienda: Usando ruedas abrasivas. Más controlado pero más lento, adecuado para grietas más pequeñas o acabado después del ranurado.

Para obtener información más detallada sobre cómo reparar grietas de soldadura en estructuras de acero., por favor haga clic aquí: https://www.meichensteel.com/a/news/repairing-cracks-in-steel-structure-welds.html

Diseño marcos de construcción de acero Es una tarea de ingeniería compleja que requiere conocimientos especializados de mecánica estructural., ciencia de materiales, códigos de construcción relevantes, y software de análisis. Este proceso DEBE ser realizado por un ingeniero estructural calificado y con licencia.. Esta guía proporciona una descripción general de los pasos involucrados., no es un sustituto de los servicios profesionales de ingeniería.

Marcos de construcción de acero personalizados

Steel Building Frames

Fase 1: Definición del proyecto & Conceptualización

Definir los requisitos del proyecto & Alcance:

Uso del edificio & Ocupación: ¿Para qué es el edificio? (oficina, depósito, fabricación, minorista, Residencial)? Esto determina las cargas vivas., requisitos del código, y necesidades funcionales potencialmente específicas (p.ej., cargas de grúa).

Dimensiones & Geometría: Tamaño, anchura, altura libre, pendiente del techo, forma general. ¿Hay entrepisos?, Se requieren tramos específicos sin columnas.?

Ubicación: Crucial para determinar las cargas ambientales (velocidad del viento, carga de nieve, zona sísmica). También afecta los códigos de construcción locales y el diseño de cimientos..

Requisitos arquitectónicos: Integración con el diseño arquitectónico., estética deseada, tipo de revestimiento (influye en el espaciado y las cargas entre correas y correas), ubicaciones de puertas, ventanas, y otras aperturas.

Integración eurodiputada: Requisitos para climatización, plomería, sistemas eléctricos – enrutamiento, aberturas, peso del equipo.

Presupuesto & Cronograma: Restricciones que influyen en las elecciones de diseño. (eficiencia de materiales, complejidad).

Seleccionar Sistema Estructural & Diseño conceptual:

Basado en requisitos, elija el tipo de marco principal:

Marcos de portal (Marcos rígidos): Común para almacenes, edificios industriales. Eficiente para tramos despejados. Las conexiones suelen ser resistentes a momentos..

Marcos reforzados: Utiliza refuerzos diagonales. (tensión/compresión o sólo tensión) para resistir cargas laterales. Las columnas soportan principalmente carga axial., las vigas toman cargas de gravedad. Las conexiones a menudo pueden ser más simples (clavado/cortante).

Marcos resistentes a momentos: Se basa en conexiones rígidas entre vigas y columnas para resistir cargas laterales.. A menudo se utiliza en edificios de varios pisos donde no se desea arriostrar desde el punto de vista arquitectónico..

Armadura: Eficiente para luces largas, especialmente techos. Compuesto por miembros más pequeños dispuestos en triángulos..

Desarrollar el diseño preliminar: Determinar el espacio entre bahías (distancia entre marcos), espacio entre cuadros (a lo largo de la longitud del edificio), ubicaciones de columnas, y ubicaciones de refuerzo (si es aplicable). Considere la eficiencia, limitaciones arquitectónicas, y cargar caminos.

Steel Building Frames

Fase 2: Determinación de carga & Análisis

Determinar cargas (El cumplimiento del código es obligatorio):

Identifique y cuantifique todas las cargas aplicables según los códigos de construcción relevantes. (p.ej., ASCE 7 en los estados unidos, Eurocódigos en Europa, Código Nacional de Construcción de Canadá).

Puede encontrar más detalles sobre cómo diseñar marcos de construcción de acero personalizados en: https://www.meichensteel.com/a/news/customized-steel-building-frames.html