UNA criba vibratoria circular Funciona utilizando un motor para impulsar un eje excéntrico., que crea un movimiento circular de la pantalla. Este movimiento hace que los materiales en la pantalla se muevan en una trayectoria circular., Facilitar la separación de partículas según el tamaño.. Aquí te explicamos paso a paso cómo funciona una criba vibratoria circular..

Principio de funcionamiento de la criba vibratoria circular.

circular vibrating screen

Motor y eje excéntrico: El funcionamiento comienza con un motor eléctrico que acciona un eje excéntrico.. Este eje no está centrado., lo que significa que su eje de rotación está desplazado. A medida que el motor gira el eje, El diseño excéntrico hace que el eje se mueva en un movimiento circular..

Marco de pantalla: Adjunto al eje excéntrico hay un marco de cribado que sostiene una o varias superficies o mallas de cribado.. A medida que el eje excéntrico gira, imparte un movimiento circular al marco de la pantalla.

Vibración: El movimiento circular generado por el eje excéntrico crea vibraciones en el marco de la criba.. Estas vibraciones se transmiten a través de la superficie de la pantalla..

Para obtener información más detallada sobre el principio de funcionamiento de la criba vibratoria circular., por favor haga clic para visitar: https://www.zexciter.com/en/a/news/working-principle-of-circular-vibrating-screen.html

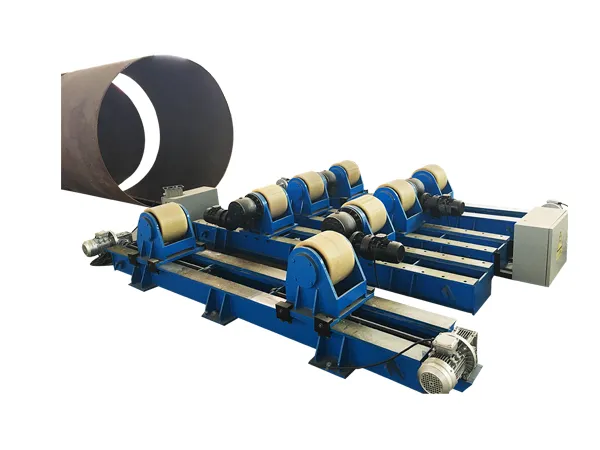
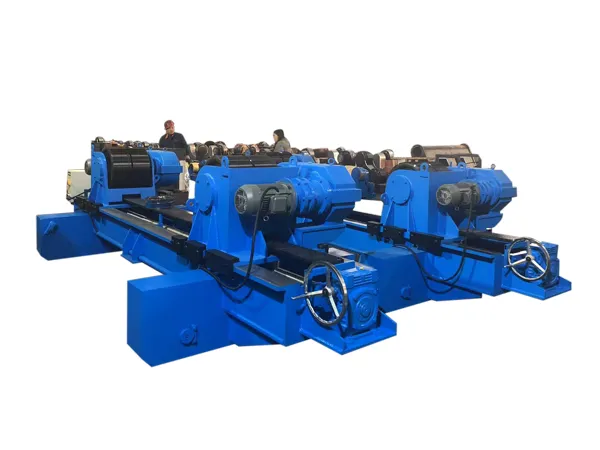
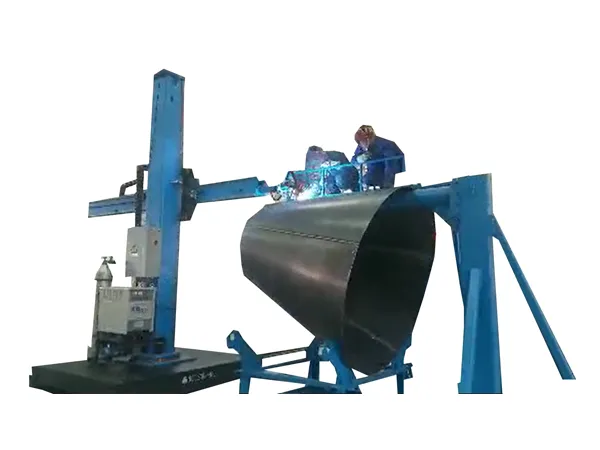
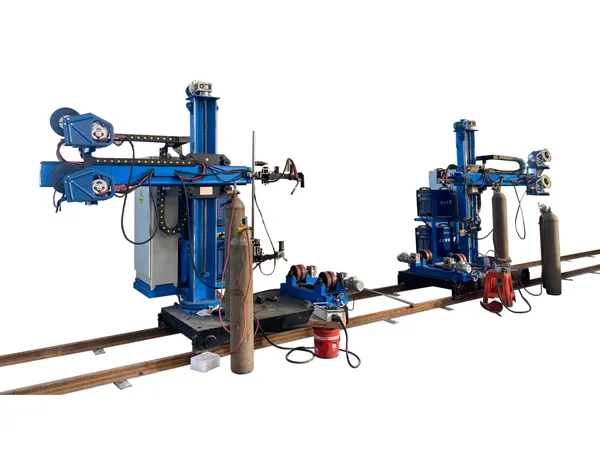
Welding turntable is a special equipment used for welding operations. It can rotate the workpiece at various angles and speeds to facilitate the welder’s welding operations. This equipment is widely used in industries that require precise and efficient welding, such as machine manufacturing, automobile manufacturing, aeroespacial, petrochemicals, and shipbuilding.

Main components of welding turntable

Base: The base part of the welded turntable that provides stability and support.

Rotary table: a rotatable work table installed on the base and used to fix the workpiece.

Sistema de manejo: usually composed of an electric motor and a reducer, responsible for providing rotational power and controlling the speed.

Control system: including electrical control box and operation panel, used to control the rotation speed, angle and direction of the turntable.

Clamp: used to fix the workpiece to keep it stable during the welding process.

Welding turntable

How the welding turntable works

The welding turntable rotates the rotary table through the drive system, and the workpiece is fixed on the rotary table. During the welding operation, the welder or automatic welding equipment can perform welding in a fixed position, and the rotating movement of the turntable ensures that the weld seam is maintained at the optimal welding position and angle.

Clamping the workpiece: The workpiece is fixed on the rotary table by the fixture to ensure that it does not move during the rotation.

Set parameters: Set parameters such as rotation speed, rotation direction and rotation angle through the control system.

Start the equipment: start the welding turntable, and the drive system starts to work, making the turntable and workpiece rotate.

Welding operation: Welders or automatic welding equipment perform welding during the rotation of the workpiece to ensure welding quality and efficiency.

For more detailed information about what a welding turntable is, haga clic para visitar: https://www.bota-weld.com/en/a/news/welding-turntable-introduction.html

Crushers are machines used to reduce the size of rocks, grava, or other materials in aggregate processing, construcción, and mining. Here are the main types of crushers, along with a brief description of each:

Crushers types

Crushers

1. Jaw Crushers

Jaw crushers use a pair of vertical jaws, one stationary and the other moving, to crush materials. The material is fed into the top of the jaws and is compressed as the movable jaw moves towards the stationary jaw, crushing it into smaller pieces. Jaw crushers are commonly used for primary crushing.

2. Gyratory Crushers

Gyratory crushers consist of a concave surface and a conical head; both surfaces are typically lined with manganese steel. The inner cone is slightly eccentric, which allows the gap between it and the concave to change, crushing the material. They are used for primary or secondary crushing of large volumes of hard materials.

3. Cone Crushers

Cone crushers are similar to gyratory crushers in that they use a mantle that gyrates within a concave bowl. Unlike gyratory crushers, cone crushers are more often used in secondary, tertiary, and quaternary crushing stages. The material is crushed by compression between the mantle and the bowl liner.

Crushers

4. Impact Crushers

Impact crushers utilize the impact principle. They come in two main types:

Horizontal Shaft Impact (HSI) Crushers: These use hammers or blow bars attached to a horizontal rotor to crush the material as it strikes a stationary anvil or breaker plates.

Vertical Shaft Impact (VSI) Crushers: These use a high-speed rotor to project material against a wear-resistant anvil or rock shelf, breaking the material along its natural fissures.

More detailed information about crusher types can be accessed by clicking here: https://www.zymining.com/en/a/news/crushers-types.html

Instalación crossed cylindrical roller bearings requires precision and careful handling to ensure optimal performance and longevity. Here’s a step-by-step guide on how to properly install these bearings:

The installation method of crossed cylindrical roller bearings

crossed cylindrical roller bearings

Preparación

Limpieza: Ensure that the bearing, housing, and all related components are clean. Remove any dirt, polvo, or debris that could affect the bearing’s performance.

Inspeccionar componentes: Check the bearing, housing, and shaft for any signs of damage or wear. Replace any damaged parts before proceeding.

Lubricación: Lubricate the bearing and related components with the appropriate lubricant recommended by the manufacturer.

Installation Process

Aligning the Bearing and Shaft:

Carefully align the bearing with the shaft. Ensure that the bearing’s inner ring fits onto the shaft smoothly.

Use a plastic or rubber mallet to gently tap the bearing into place if necessary. Avoid using excessive force to prevent damage.

Inserting the Bearing:

Place the bearing onto the shaft and ensure that it is seated correctly.

For larger bearings, use a bearing heater to expand the inner ring slightly, allowing for easier installation.

Mounting the Outer Ring:

Align the outer ring with the housing or bearing seat.

Gently tap the outer ring into place using a soft mallet or a press, ensuring even pressure to avoid misalignment.

Asegurar el rodamiento:

Once the bearing is in place, secure it with the appropriate locking mechanism, such as a lock nut, retaining ring, or end cap.

Tighten any screws or bolts to the manufacturer’s recommended torque specifications to prevent over-tightening or under-tightening.

Check Alignment:

Rotate the bearing assembly by hand to check for smooth operation and proper alignment.

Ensure there is no excessive play or binding in the bearing.

Final Lubrication:

Apply additional lubricant if necessary, ensuring that the bearing is adequately lubricated for operation.

Follow the manufacturer’s guidelines for the type and amount of lubricant to use.

Test Run:

Once installed, run the bearing at low speed and check for any abnormal noise, vibration, or heat generation.

Gradually increase the speed to the normal operating level while continuing to monitor the bearing’s performance.

crossed cylindrical roller bearings

Post-Installation

Inspección regular: Periodically check the bearing for signs of wear, lubrication levels, and overall performance.

Mantenimiento: Follow the maintenance schedule recommended by the bearing manufacturer to ensure long-term reliability.

For more detailed information about the installation method of crossed cylindrical roller bearings, por favor haga clic aquí:https://www.boyingbearing.com/en/a/news/crossed-cylindrical-roller-bearing-installation-method.html

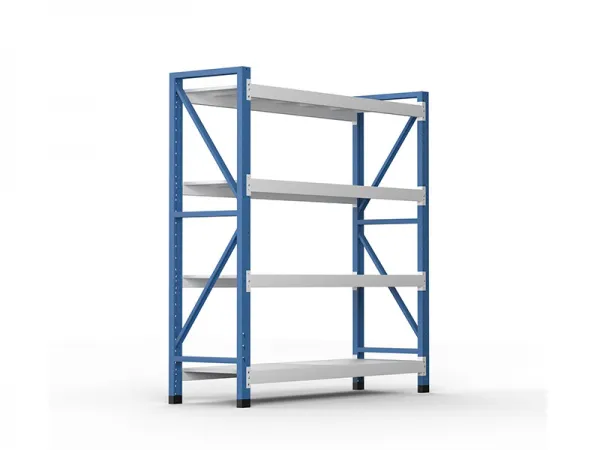
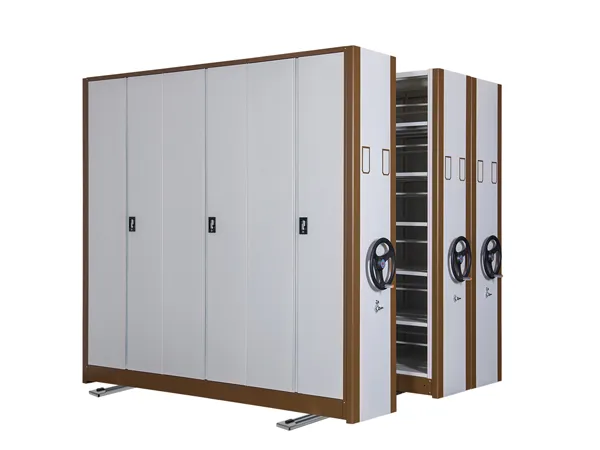
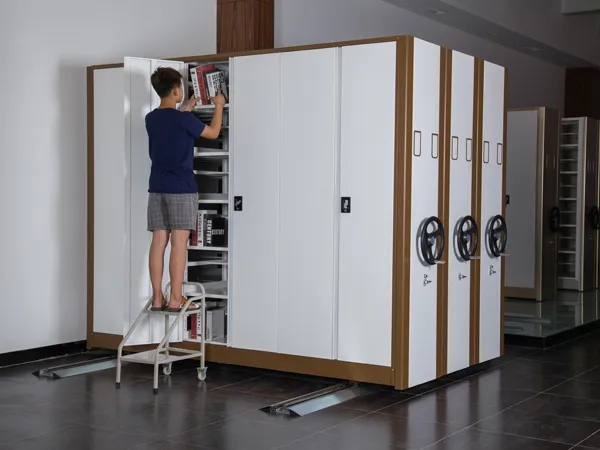
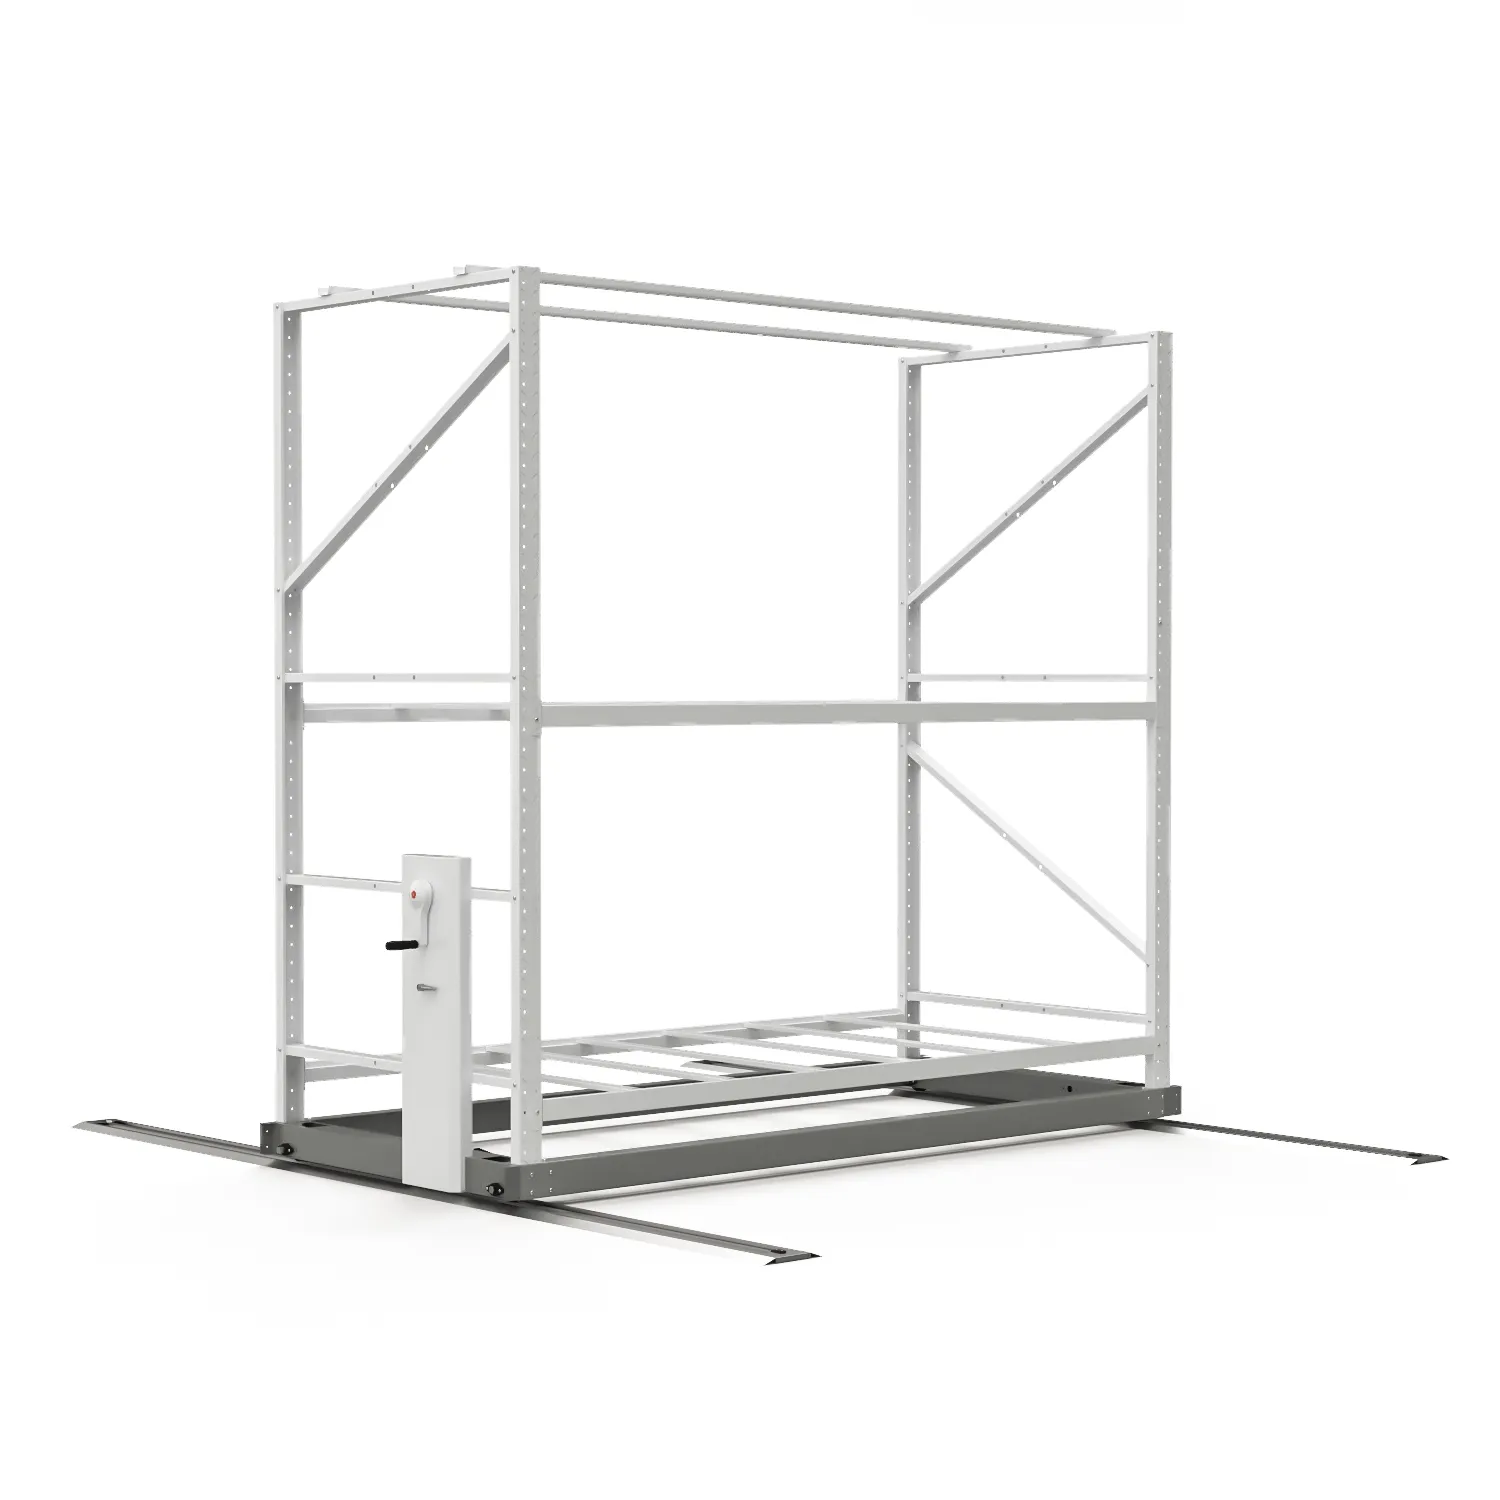
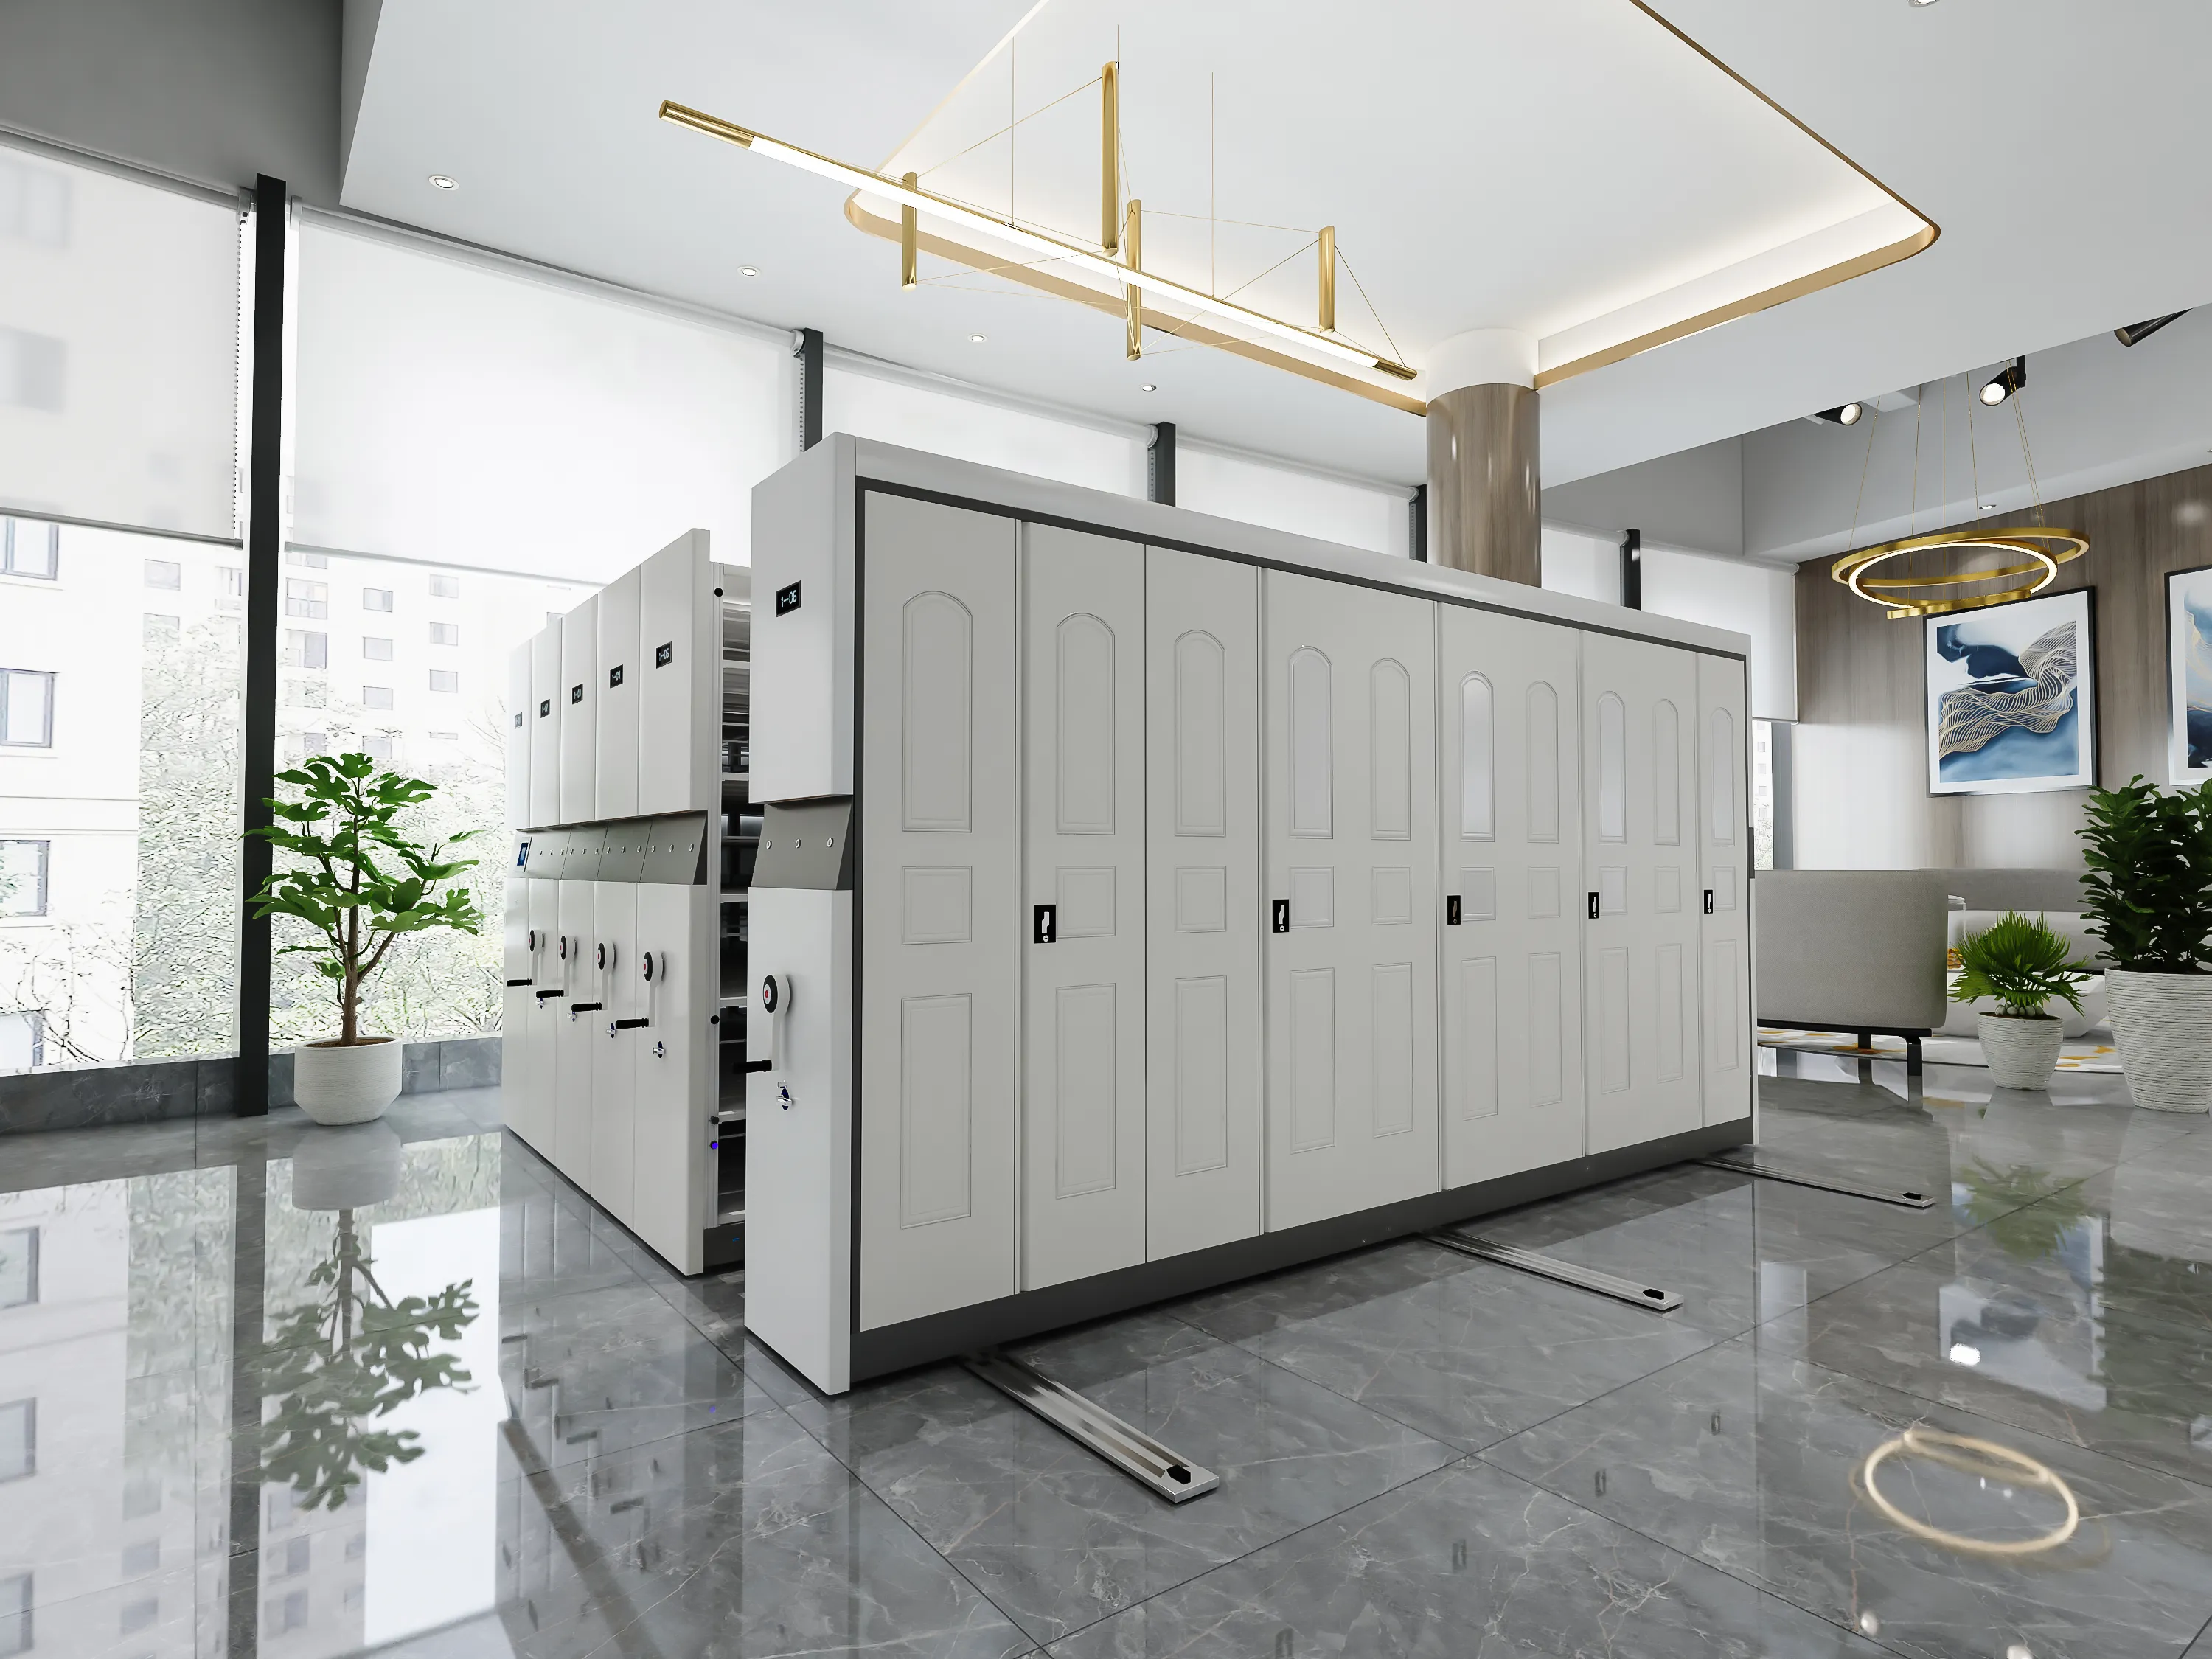
Sistemas de estanterías móviles para pasillos. are an efficient storage solution that are widely used in libraries, archivo, almacenes, museos y otros campos. Este sistema maximiza la utilización del espacio y aumenta significativamente la densidad de almacenamiento al introducir rieles móviles y estanterías en las estanterías tradicionales.. Este artículo detallará cómo funcionan los sistemas de estanterías móviles para pasillos., sus componentes estructurales, métodos de instalación, y sus beneficios.

Principio de funcionamiento

El concepto central de un sistema de estanterías móviles para pasillos es montar varias estanterías sobre rieles móviles.. Por medios manuales o motorizados, los usuarios pueden mover estas estanterías, crear un pasaje temporal para acceder a los elementos de almacenamiento deseados. De este modo, el sistema solo abre canales cuando es necesario, convirtiendo así el espacio originalmente utilizado para canales fijos en espacio de almacenamiento y mejorando la eficiencia del almacenamiento..

Mobile Aisle Shelving Systems

Componentes estructurales

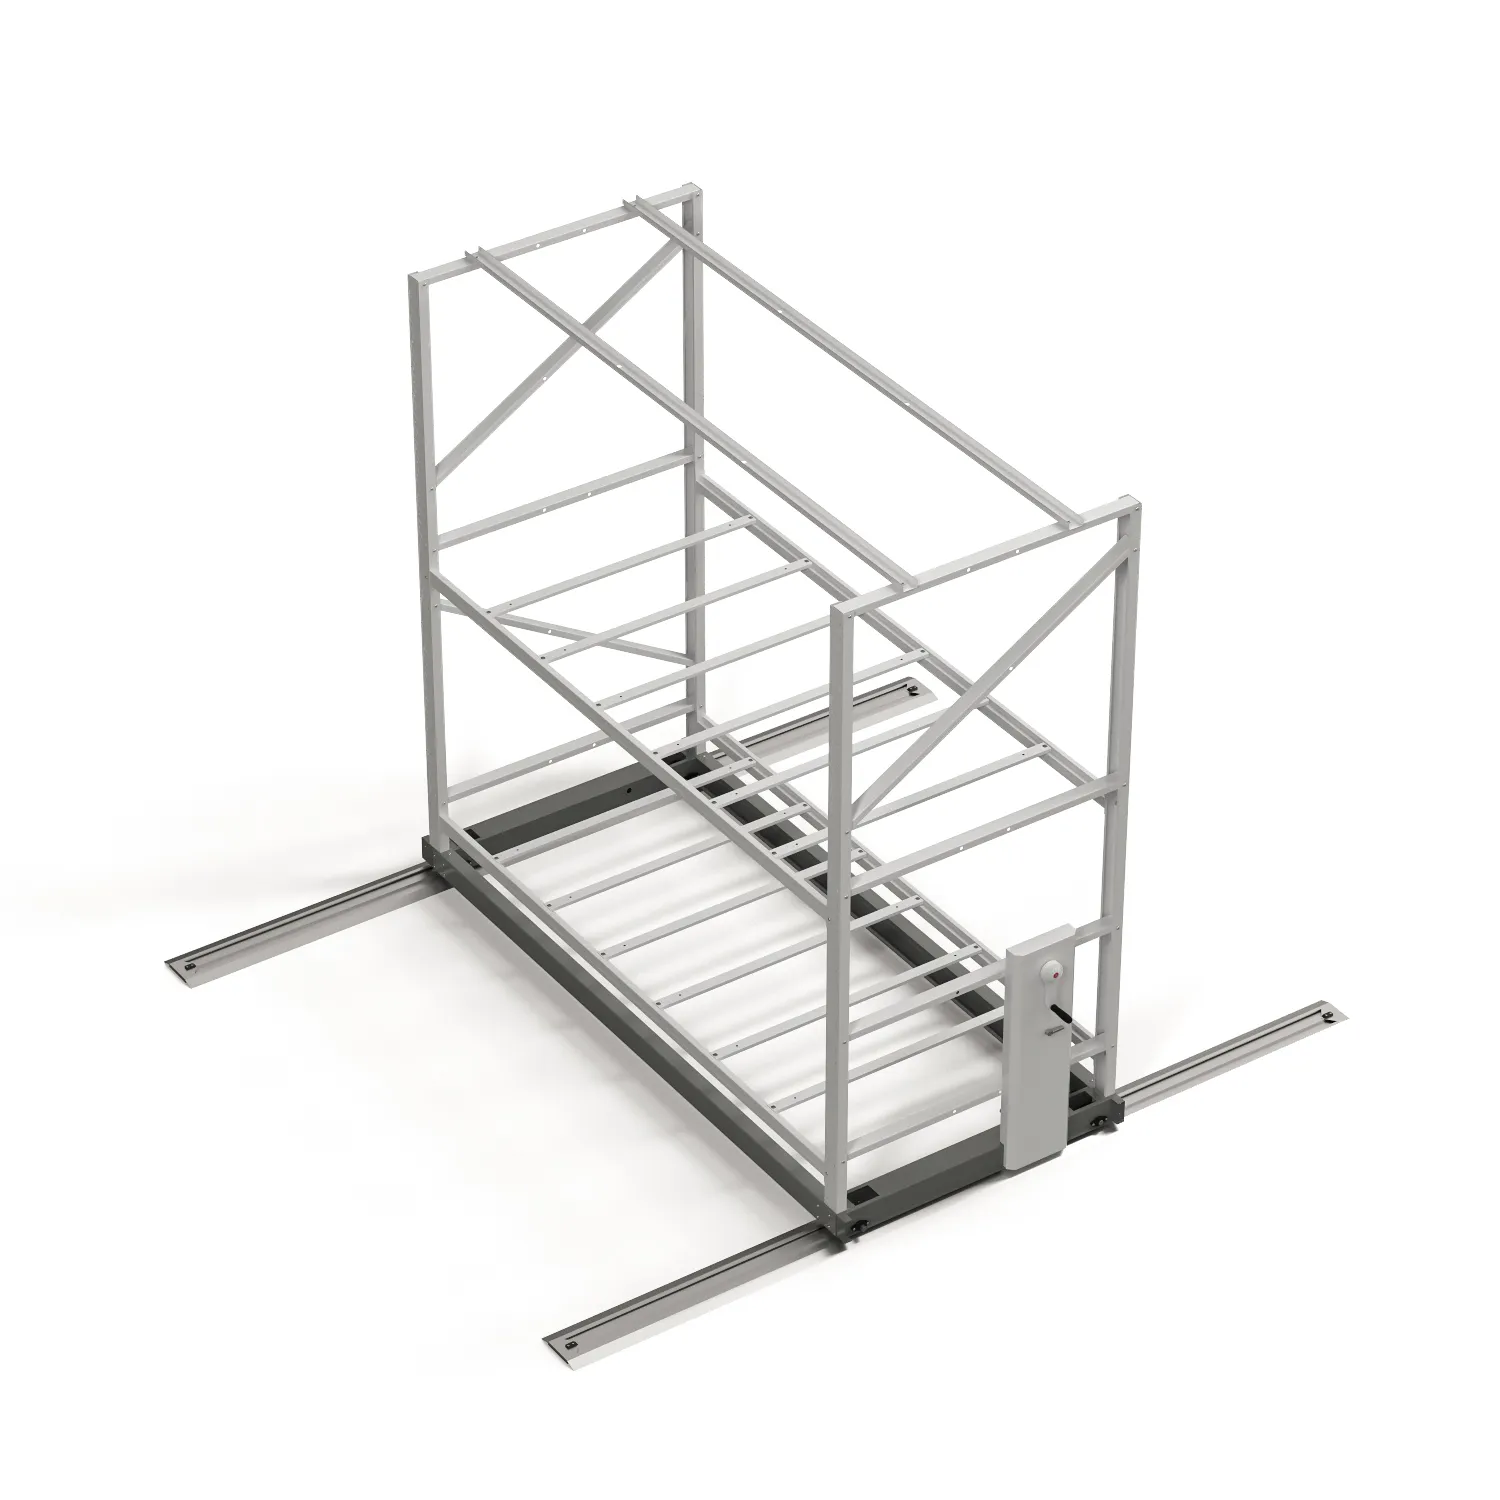
El sistema de estanterías de canales móviles consta principalmente de las siguientes partes:

Sistema de seguimiento: Los rieles son la base de un sistema de estanterías móviles para pasillos y, por lo general, están hechos de acero de alta resistencia.. Se instalan rieles en el piso para garantizar un movimiento suave de la estantería.. El diseño de la vía debe considerar la planitud y la capacidad de carga del terreno..

Estantería: Una estantería es la estructura real para almacenar artículos y consta de múltiples capas de estantes y soportes ajustables.. Los tamaños y materiales de las estanterías varían según las necesidades de almacenamiento y las condiciones ambientales..

Sistema de manejo:

accionamiento manual: Utiliza manijas o ruedas para empujar la estantería hacia adelante.. Los sistemas manuales generalmente son adecuados para aplicaciones de menor escala..

Accionamiento eléctrico: Equipado con un motor eléctrico para controlar el movimiento de la estantería mediante botones o pantalla táctil.. Los sistemas motorizados son adecuados para entornos de almacenamiento que requieren acceso frecuente y volúmenes mayores..

Sistema de seguridad: incluyendo dispositivos antivuelco, Sensores infrarrojos y botones de parada de emergencia para garantizar la seguridad de personas y objetos durante el movimiento..

Metodo de instalacion

La instalación de un sistema de estanterías móviles para pasillos requiere habilidades profesionales y medidas precisas.. Los pasos principales son los siguientes.:

Preparación del terreno: Asegúrese de que el suelo sea plano y tenga suficiente capacidad de carga.. Realice refuerzos del suelo o ajustes si es necesario..

instalar la pista: Según los dibujos de diseño., posicionar y fijar con precisión la pista. Asegúrese de que los rieles estén paralelos y nivelados para permitir un movimiento suave de la estantería..

Montar estanterías: Ensamble las estanterías según sea necesario, ajustar la altura de los estantes para acomodar artículos de almacenamiento de diferentes tamaños.

Instalar sistemas de accionamiento y dispositivos de seguridad.: Instalar sistemas de accionamiento manual o eléctrico., establecer dispositivos de seguridad, y realizar pruebas y puesta en marcha.

Depuración del sistema: Una vez completada la instalación, Realizar una prueba exhaustiva de todo el sistema para garantizar que las estanterías se muevan sin problemas y que los dispositivos de seguridad funcionen correctamente..

Mobile Aisle Shelving Systems

Ventaja

Los sistemas de estanterías móviles para pasillos ofrecen los siguientes beneficios importantes:

Alta utilización del espacio: Reduciendo el número de canales fijos, la densidad de almacenamiento aumenta considerablemente y se mejora la eficiencia de utilización del espacio.

Para obtener información más detallada sobre la introducción del sistema de estanterías móviles para pasillos, por favor haga clic aquí: https://www.etegreen.com/en/a/news/introduction-to-mobile-aisle-shelving-system.html

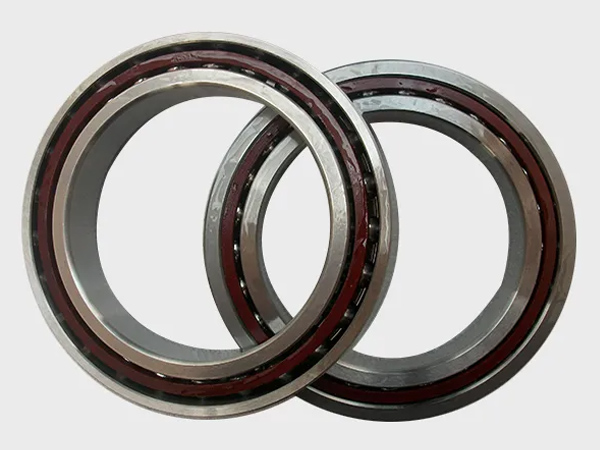
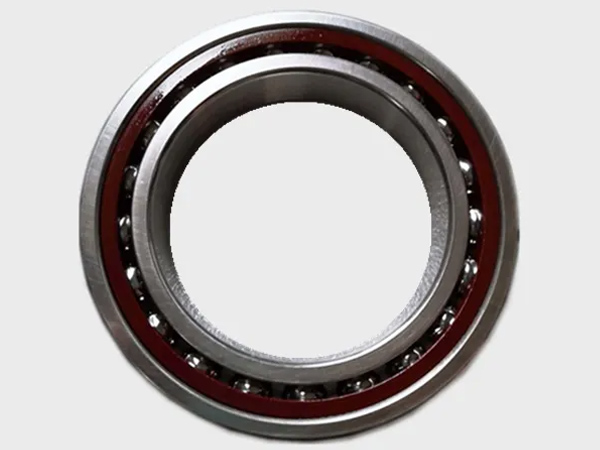
The correct installation method for rodamientos de husillo de máquina herramienta is critical to ensure precision, actuación, y longevidad de la máquina. Aquí hay una guía detallada sobre cómo instalar estos rodamientos correctamente..

Preparación

Limpieza del área de trabajo: Asegúrese de que el área de trabajo esté limpia y libre de contaminantes como polvo., suciedad, y virutas de metal.

Inspección: Verifique todos los componentes, incluyendo los rodamientos, huso, y vivienda, por cualquier signo de daño o desgaste. Reemplace cualquier pieza defectuosa.

Herramientas y equipo: Reúna todas las herramientas y equipos necesarios., como calentadores de rodamientos, guantes limpios, mazos suaves, e instrumentos de medición apropiados.

Lubricación

Prelubricación: Dependiendo del tipo de rodamiento y de las recomendaciones del fabricante., Lubrique previamente los rodamientos con el lubricante adecuado.. Esto podría ser grasa o aceite..

Calefacción

Calefacción de rodamientos: Utilice un calentador de rodamientos para calentar uniformemente el rodamiento a una temperatura recomendada por el fabricante., normalmente entre 80°C y 100°C (176°F a 212°F). Esto permite que el rodamiento se expanda ligeramente para facilitar la instalación en el eje..

Rodamientos de husillo

Pasos de instalación

Alinear el rodamiento: Alinee el rodamiento con el eje para asegurarse de que se deslice recto sin inclinarse ni torcerse..

Monte el rodamiento:

Ajuste a presión: Para rodamientos que requieren un ajuste a presión, Utilice una prensa hidráulica o un dispositivo adecuado para presionar el rodamiento sobre el husillo.. Aplique presión uniformemente y asegúrese de que el rodamiento esté presionado de lleno para evitar una desalineación..

Ajuste deslizante.: Para rodamientos que se calientan y luego se deslizan sobre el husillo, Asegúrese de que el rodamiento se coloque de forma rápida y precisa mientras aún está expandido por el calentamiento..

Enfriamiento y asientos: Deje que el rodamiento se enfríe y se contraiga sobre el eje., asegurando un ajuste perfecto. Verifique que el rodamiento esté asentado correctamente contra cualquier hombro o tope en el eje..

Asegurar el rodamiento

Mecanismos de retención: Utilice tuercas de retención, arandelas de seguridad, u otros mecanismos de retención especificados por el fabricante para asegurar el rodamiento en su lugar. Apriete las tuercas de retención al valor especificado usando una llave dinamométrica.

Precarga axial: Establezca la precarga axial de los rodamientos según las especificaciones del fabricante.. Esto puede implicar ajustar los espaciadores o usar herramientas de precarga..

Instalación en la vivienda

Alineación de viviendas: Asegúrese de que el conjunto del eje y el cojinete esté alineado con la carcasa.. La desalineación puede causar fallas prematuras en los rodamientos.

Insertar conjunto: Inserte con cuidado el conjunto del eje y el cojinete en la carcasa., asegurándose de que esté alineado y no dañe el rodamiento o la carcasa.

Para obtener información más detallada sobre el método de instalación de los rodamientos para husillos de máquinas herramienta, por favor haga clic aquí: https://www.lkwebearing.com/news-center/machine-tool-spindle-bearing-installation.html

Los siguientes fabricantes de cribas vibratorias presentarán en detalle las fallas comunes y las soluciones de las cribas vibratorias lineales. is a kind of screening equipment commonly used in industrial production. Impulsa el cuerpo de la criba para realizar un movimiento lineal a través de un motor de vibración para lograr la clasificación y cribado de materiales.. Sin embargo, en uso real, Es un problema común que la criba vibratoria produce un ruido fuerte., que no sólo afecta al entorno laboral, pero también puede causar daños a la audición del operador. Este artículo analizará las razones del alto ruido de las cribas vibratorias lineales y propondrá las soluciones correspondientes..

El fuerte ruido generado por una criba vibratoria lineal se puede atribuir a varios factores. Estas son las razones principales y las posibles soluciones para mitigar el ruido.:

Criba vibratoria de deshidratación de alta frecuencia

1. Piezas y componentes sueltos

Pernos flojos, nueces, u otros componentes de fijación pueden provocar vibraciones y ruidos..

y las razones deben ser investigadas y tratadas a tiempo para resolver: Inspeccione y apriete periódicamente todos los sujetadores y componentes..

2. Rodamientos desgastados o dañados

Los rodamientos en mal estado pueden generar un ruido importante debido al aumento de fricción y vibración..

y las razones deben ser investigadas y tratadas a tiempo para resolver: Inspeccione los rodamientos periódicamente., lubricarlos apropiadamente, y reemplace cualquiera que esté desgastado o dañado.

3. Motor vibratorio desequilibrado

Un motor desequilibrado puede provocar vibraciones desiguales, lo que lleva a un ruido fuerte.

y las razones deben ser investigadas y tratadas a tiempo para resolver: Asegúrese de que el motor esté correctamente equilibrado y alineado.. Reemplace o repare el motor si es necesario..

4. Instalación incorrecta

La instalación incorrecta de la pantalla o sus componentes puede provocar una desalineación y un aumento del ruido..

y las razones deben ser investigadas y tratadas a tiempo para resolver: Verifique que todos los componentes estén instalados correctamente y alineados según las especificaciones del fabricante..

Criba vibratoria de arco

5. Velocidad de alimentación excesiva

Alimentar la criba con demasiado material puede sobrecargarla, causando ruido excesivo.

y las razones deben ser investigadas y tratadas a tiempo para resolver: Ajuste la velocidad de alimentación a un nivel óptimo que la pantalla pueda manejar sin sobrecargar.

6. Condición de los medios de pantalla

Los medios de pantalla desgastados o mal tensados ​​pueden agitarse y generar ruido..

y las razones deben ser investigadas y tratadas a tiempo para resolver: Inspeccione los medios de la pantalla con regularidad., reemplazar las secciones desgastadas, y asegurar una tensión adecuada.

Para obtener información más detallada sobre las razones del alto ruido de las cribas vibratorias lineales, por favor haga clic aquí: https://www.hsd-industry.com/news/reasons-for-the-high-noise-of-linear-vibrating-screens/

In the field of industrial equipment maintenance, as one of the key equipment, la excitador de pantalla vibratoria must follow a series of steps and standards during its maintenance process to ensure its reliability and durability. The maintenance process of the vibrating screen exciter includes a series of strict operations, from taking photos and archiving the original condition of the machine after entering the factory, to the comprehensive process of painting and shipping. Each step significantly affects the quality of the maintenance results. In order to ensure the quality of maintenance, various requirements in vibrating screen exciter maintenance are also particularly critical. From bearings to boxes, to gears and other parts, relevant standards and specifications need to be strictly adhered to to ensure that the vibrating screen exciter is maintained during maintenance. Finalmente, the expected working performance can be achieved.

Vibrating screen exciter maintenance

DF series vibrating screen exciter

1. Vibrator maintenance process

Take photos and archive the original condition of the machine after entering the factory → Shot blasting → Spray primer → Disassemble the vibrator → Take photos and archive the parts → Clean the parts → Inspect, test and archive → Issue a test report → The salesperson will confirm the damage with the user Form a damage determination confirmation form → formulate a maintenance plan → receive parts → inspect, record and archive → ultrasonic cleaning → assembly → test and record and file → spray paint → ship

2. Vibrator maintenance requirements

  • hemos resuelto los pasos de instalación de los rodillos de molino de rodillos de alta presión y las camisas de los rodillos para su referencia

It must be replaced during maintenance, and high-quality SKF special bearings for vibrating screens must be selected to ensure that they can withstand high-intensity vibration working environments and maintain long-term stable operation. Careful installation and adjustment work is also essential to ensure the correct installation position and normal working condition of the bearings.

  • Sellando

The replacement of seals is an important guarantee for the normal operation of the exciter. Al reemplazar, it is necessary to select high-quality seals that match the original parts to ensure that they can effectively prevent the leakage of lubricating oil or other substances, thereby protecting the internal parts of the exciter from damage.

  • Box

Boxes that are cracked, deformed, thread damaged or worn must be replaced; when the box hole and the bearing outer ring installation position are worn and the bearing does not meet the assembly requirements, they must be replaced. The new box should be replaced with high-strength ductile iron QT400-12 material, which has no defects such as slag inclusions, los poros, grietas, etc. and has been inspected by ultrasonic to ensure its durability and stability. During the processing of the cabinet, the precision machining process of the CNC machining center should be strictly implemented to ensure the accuracy and stability of the cabinet.

DE Series Vibrating Screen Exciter

  • Axis

During the maintenance process, shaft replacement is a key link to ensure the normal operation of the vibrator. If there are obvious concave and convex marks on the surface of the shaft, the ovality of the bearing position and gear position is ≥0.01mm, and the assembly dimensions of the shaft and the inner ring of the bearing do not meet the requirements, they must be replaced. The replacement shaft is made of alloy structural steel 42CrMo processed by CNC machine tools, which can ensure good strength and wear resistance. During the installation process, ensure that the assembly dimensions of the shaft and the inner ring of the bearing meet the requirements to ensure the operation of the vibrator.

For more detailed information about vibrating screen exciter maintenance procedures and maintenance requirements, por favor haga clic aquí: https://www.hsd-industry.com/news/vibrating-screen-exciter-maintenance/

In industries such as mining and coal preparation, materials need to be screened and classified before use. los Pantalla vibrante uses mechanized vibration to classify materials according to different sizes. It has a large processing capacity and high screening efficiency, which is better than traditional manual sorting. The selection efficiency will be improved many times, and it can be said to be a “good helper” in the screening work. Sin embargo, if the screen machine is used improperly, it will cause mechanical failure, short service life and other problems. In order to avoid these problems, the following Haiside vibrating screen manufacturer will introduce the operating steps and precautions of the vibrating screen.

Operating a vibrating screen involves several steps to ensure smooth and efficient operation while maintaining safety standards. Here are the typical operating steps and precautions for vibrating screens:

Tamiz de plátano doble

Pre-Operation Inspection:

Perform a visual inspection of the vibrating screen and its components to check for any signs of damage, tener puesto, or loose connections.

Ensure that all safety guards, covers, and access doors are in place and securely fastened.

Verify that the screen deck is clean and free of debris or buildup that could affect performance.

Start-Up Sequence:

Turn on the power supply to the vibrating screen and any associated equipment, such as feeders or conveyors.

Allow the vibrating screen to reach its operating speed gradually to avoid excessive stress on the motor and drive system.

Monitor the screen’s operation for any abnormal vibrations, ruidos, or other signs of malfunction.

Adjustment of Settings:

Adjust the amplitude, frecuencia, and inclination of the vibrating screen to optimize performance for the specific application and material being processed.

Fine-tune the settings as needed to achieve the desired separation efficiency, rendimiento, y calidad del producto.

For more detailed information about the operating steps and precautions of the vibrating screen, por favor haga clic para visitar:https://www.hsd-industry.com/news/vibrating-screen-operation-steps-and-precautions/

Cylindrical roller bearings are designed to handle heavy radial loads and operate at high speeds. They come in various sizes and configurations to suit different applications. Here’s a summary of the typical sizes and dimensions for cylindrical roller bearings:

Basic Designations

Rodamientos de husillo

Cylindrical roller bearings are typically categorized by their design, denoted by specific series designations. Common series include:

N Series: Unica fila, inner ring has two flanges, outer ring has no flanges.

NU Series: Unica fila, outer ring has two flanges, inner ring has no flanges.

NJ Series: Unica fila, outer ring has two flanges, inner ring has one flange.

NUP Series: Unica fila, outer ring has two flanges, inner ring has one flange and a loose flange ring.

NF Series: Unica fila, outer ring has one flange, inner ring has two flanges.

NN Series: Double row, used for applications requiring high radial load capacity.

NNU Series: Double row, used for high radial load applications with greater rigidity.

Common Sizes and Dimensions

Cylindrical roller bearings come in a wide range of sizes. Here is a summary of typical dimensions for some of the common series:

NU Series

For more detailed information about cylindrical roller bearing models, por favor haga clic aquí: https://www.lkwebearing.com/news-center/cylindrical-roller-bearing-size.html