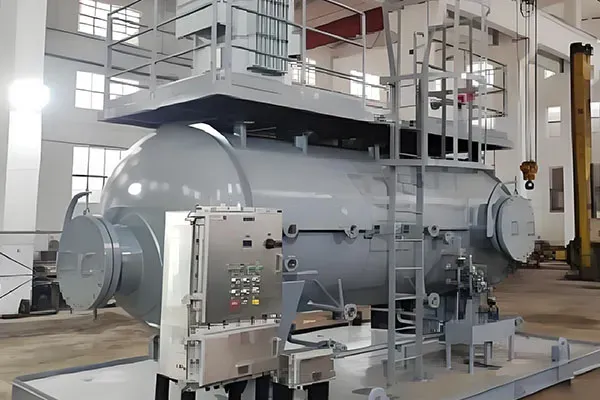
Rotadores de soldadura are essential equipment in industries such as pressure vessel manufacturing, pipe welding, and tank fabrication. They help rotate cylindrical workpieces smoothly, ensuring consistent weld quality and improving efficiency. Sin embargo, like any industrial machine, a welding rotator may sometimes fail to turn, causing production delays.

Welding rotator not turning and troubleshooting

Welding rotator

Initial Checks (The Simple Stuff)

Start with the most common and easiest-to-fix issues before you start taking things apart.

Emergency Stop (E-Stop): Is the red E-Stop button pushed in? This is the most common reason for a machine not starting. Twist and pull it out to reset it.

Sobrecarga: Is the workpiece too heavy for the rotator’s rated capacity? An overloaded motor may trip an internal protector or simply not have enough torque to start.

Physical Obstruction: Is anything physically blocking the wheels, the workpiece, or the drive chain/gears? Look for dropped tools, abrazadera, escombros, or weld spatter that might be jamming the mechanism.

Workpiece Position: Is the workpiece centered and balanced correctly on the rotator wheels? An off-center load can create too much resistance.

Systematic Troubleshooting Guide

If the initial checks don’t solve the problem, follow this step-by-step process. You may need a multimeter for some of these steps.

Paso 1: Check the Power Supply

Source Power: Check the circuit breaker or fuse in your shop’s electrical panel that supplies power to the rotator. Has it tripped?

Machine Power: Check the main power switch on the rotator itself.

Cables and Plugs: Inspect the entire length of the power cord for cuts, crushing, o daño. Check the plug for bent or burnt prongs.

Voltage Check (Use a Multimeter):

Safely check for the correct voltage (p.ej., 110V, 220V, 480V 3-phase) at the wall outlet.

If you are qualified, open the machine’s main control box (with power OFF), then carefully turn the power back on and check for correct voltage at the input terminals. (Warning: Only do this if you are trained and comfortable working with live electricity).

Check the Control System

The problem often lies between you pressing the button and the motor receiving the signal.

Pendant / Remote Control: This is a very common failure point.

Connection: Is the pendant plugged in securely to the main unit?

Cable: Inspect the pendant cable for damage. It can get run over, crushed, or cut.

Buttons: Are the Forward/Reverse/Speed buttons physically working? Sometimes they get stuck or broken internally.

Speed Potentiometer (Dial): Make sure the speed dial is not set to zero. Try turning it up. Sometimes these dials fail and lose contact.

For more detailed information on what to do if the welding rotator not turning and troubleshooting, por favor haga clic aquí: https://www.bota-weld.com/en/a/news/welding-rotator-not-turning-and-troubleshooting.html

Are you preparing to install a new máquina de soldadura de pórtico? A proper installation is crucial for ensuring the machine’s performance, seguridad, y longevidad. This comprehensive guide will walk you through the entire Gantry welding machine installation process step-by-step, providing you with the essential information you need to get your machine up and running smoothly.

A gantry welding machine, often used for heavy-duty fabrication, requires a precise and meticulous setup. Skipping steps or making assumptions can lead to operational issues and safety hazards. By following this detailed Gantry welding machine installation manual, you can avoid common pitfalls and ensure a successful installation.

Proceso de instalación de la máquina de soldadura de pórtico

gantry welding machine

Paso 1: Pre-installation Preparation and Site Assessment

Before you even start unpacking your machine, proper site preparation is key. This stage is a critical part of the Gantry welding machine installation process.

Location Selection: Choose a flat, las dimensiones de la cavidad, and strong foundation that can support the machine’s weight and the parts being welded. Ensure the area is free from dust, humedad, and excessive vibration.

Power and Utilities Check: Confirm that the power supply meets the machine’s requirements. Verify the availability of compressed air and any other necessary utilities. This is a common point of failure, so double-checking is crucial.

Unpacking and Inventory: Carefully unpack all components and use the packing list to verify that all parts, perno, and accessories are present. Report any missing or damaged items immediately to the supplier.

Paso 2: Assembling the Gantry Structure

This is where the physical assembly begins. The proper erection of the gantry is fundamental to the stability of the entire system.

Foundation and Base: Securely fasten the machine’s base rails to the pre-prepared foundation using anchor bolts. Use a level to ensure the rails are perfectly aligned and level. Any misalignment here will impact the welding precision.

Gantry Beam Assembly: Carefully lift and place the main gantry beam onto the base rails. Follow the instructions in the Gantry welding machine installation guide to correctly secure the beam. This often involves tightening large bolts to specific torque specifications.

For more detailed information about the installation process of the gantry welding machine, por favor haga clic aquí: https://www.bota-weld.com/en/a/news/gantry-welding-machine-installation-process.html

UNA máquina de hacer briquetas de carbón está diseñado para comprimir materias primas en briquetas sólidas con alta densidad y durabilidad.. Sin embargo, en producción real, Muchos usuarios encuentran que las briquetas no son lo suficientemente fuertes., Se rompe fácilmente durante el manejo., almacenamiento,o transporte. Este problema no sólo reduce la calidad del producto sino que también aumenta la pérdida de material y los costos operativos..

Razones por las que las briquetas no son fuertes

briquetting machine

Parte 1: Razones por las que las briquetas finales no son fuertes

Cuando las briquetas se desmoronan fácilmente, casi siempre es un problema con una de las tres áreas clave: la materia prima, la condición/configuración de la máquina, o el procedimiento operativo.

UNA. Problemas de materias primas (los “Ingredientes”)

Esta es la causa más frecuente de briquetas débiles..

Contenido de humedad incorrecto: Este es el #1 culpable.

demasiado mojado (>12-15%): El exceso de humedad se convierte en vapor dentro del troquel.. Este vapor crea alta presión., lo que puede provocar grietas o incluso pequeñas explosiones en la briqueta al salir de la máquina. La briqueta final será débil y tendrá una textura áspera., superficie fracturada.

Demasiado seco (<6-8%): El material no fluirá ni se compactará adecuadamente.. lignina (el aglutinante natural de la biomasa) Requiere una pequeña cantidad de humedad para plastificar y unir eficazmente.. El material demasiado seco produce una textura quebradiza., briqueta mal formada.

Rango ideal: Para la mayor parte de la biomasa (como aserrín), el contenido de humedad ideal es 8% a 12%.

Tamaño de partícula inadecuado:

Demasiado grande: Las partículas grandes crean vacíos (bolsas de aire) dentro de la briqueta, conduciendo a puntos débiles. No se compactan uniformemente, dando como resultado un producto que se rompe fácilmente.

demasiado bien (como polvo): Aunque es mejor que demasiado grande, El polvo extremadamente fino a veces puede atrapar aire y puede requerir mayor presión o proporciones de aglutinante específicas para formar una briqueta fuerte..

Tamaño Ideal: En general, las partículas deben estar debajo 5-6 mm para prensas de tornillo. Un consistente, el tamaño uniforme es clave.

Bajo contenido de lignina o falta de aglutinante:

La lignina es un polímero natural de la madera y la biomasa que se funde bajo altas temperaturas y presión., actuando como un pegamento natural. Materiales como el aserrín son ricos en lignina..

Materiales con bajo contenido de lignina (p.ej., cáscaras de arroz, algunos pastos) o materiales que no sean biomasa (p.ej., polvo de carbón, polvo de carbón) no se unirán bien por sí solos. Requieren un aglutinante externo (como el almidón, melaza, o arcilla) para ser mezclado en.

Pureza de los materiales:

Contaminantes como arena, suelo, piedras, o el metal interrumpirá el proceso de compactación, crear puntos débiles, y dañar gravemente los componentes de la máquina. (especialmente el tornillo y morir).

segundo. Problemas relacionados con la máquina (los “El equipo”)

Si tu material es perfecto, el problema está en la propia máquina.

Temperatura incorrecta:

Demasiado bajo: Si los collares calefactores del troquel no están lo suficientemente calientes, La lignina de la biomasa no se derrite correctamente.. sin esto “pegamento” siendo activado, la briqueta estará suelta y quebradiza.

Para obtener información más detallada sobre las razones por las que la máquina briquetadora no es fuerte, por favor haga clic aquí: https://www.zymining.com/en/a/news/reasons-why-briquetting-is-not-strong.html

The energy consumption of a máquina de hacer briquetas de carbón is a critical factor that directly impacts the profitability and environmental sustainability of a briquetting operation. A thorough analysis involves understanding where energy is used, what factors influence its consumption, and how it can be optimized.

Análisis del consumo de energía de las máquinas briquetadoras.

briquetting machine

1. Major Energy Consuming Components

The total energy consumption of a briquetting plant is not just the machine itself but the entire process line.

Main Press Motor: This is the primary energy consumer, typically accounting for 70-90% of the machine’s direct energy use. It powers the mechanical or hydraulic system that applies immense pressure to the raw material.

Mechanical Piston Press: The motor drives a flywheel, which provides the high-impact force for compression. It has high peak power draws.

Screw Press (Extruder): The motor provides continuous high torque to turn the screw that forces material through the die.

Prensa hidráulica: The motor runs a hydraulic pump to build up fluid pressure, which then drives the compression ram.

Sistema de calefacción (for Screw Presses): Screw presses require an external heating system (heating collars/bands) to raise the temperature of the die to 280-380°C (530-715°F). This heat melts the lignin in the biomass, which acts as a natural binder. The heaters represent a significant and constant energy draw, often 15-25% of the machine’s total consumption.

Ancillary and Pre-Processing Equipment: This is a crucial and often underestimated part of the total energy footprint.

Dryer: If the raw material’s moisture content is too high (>12%), a dryer is needed. Drying is often the single most energy-intensive process in the entire plant, sometimes consuming more energy than the briquetting machine itself.

Crusher / Hammer Mill: Reduces the size of the raw material to a suitable, tamaño de partícula uniforme (p.ej., 3-5 mm). This requires a powerful motor.

Conveyors and Feeders: Screw conveyors, transportadores de correa, and feeding mechanisms use smaller motors but run continuously, contributing to the overall load.

Control Panel and Automation: The PLC, sensors, and other electronics consume a relatively small amount of power but are essential for operation.

More detailed information about briquetting machine energy consumption analysis can be found here: https://www.zymining.com/en/a/news/energy-consumption-analysis-of-briquetting-machines.html

HPGR improve grinding efficiency primarily through a fundamentally different and more energy-efficient breakage mechanism called inter-particle comminution. This process not only consumes significantly less energy (20-50% less) than traditional grinding mills but also induces micro-cracks in the particles, making subsequent grinding stages easier and improving mineral liberation, which boosts overall plant throughput and metallurgical recovery.

How HPGR Equipment Improves Grinding Efficiency

HPGR

1. The Core Mechanism: How an HPGR Works

To understand its efficiency, you first need to understand how it works, which is very different from a conventional SAG or Ball Mill.

Feed Introduction: Material (mineral) is choke-fed from a hopper into the gap between two large, counter-rotating rolls.

High-Pressure Zone: One roll is fixed, while the other is on a hydraulic system that allows it to move, applying immense pressure (typically >100 MPa) to the material.

Particle Bed Compression: As the material is drawn into the gap, it forms a compressedbed.The key is that the pressure is not applied to individual particles against a steel surface. El sellado superior e inferior de esta bolsa con válvula de fondo cuadrado no requiere costura, the force is transmitted through the bed of particles.

Inter-Particle Comminution: This is the secret to the HPGR’s success. The intense pressure causes particles to crush against each other. Rock-on-rock grinding is far more energy-efficient than the rock-on-steel impact and attrition that happens in a ball mill.

Descargar: The material exits the rolls as a compacted, frágil “cake” o “escama,” which is then de-agglomerated before moving to the next stage.

2. Key Ways HPGR Improves Grinding Efficiency

The efficiency gains from this mechanism can be broken down into several key areas.

una) Superior Energy Efficiency (The Primary Benefit)

This is the most significant advantage. Grinding is the most energy-intensive process in most mining operations.

Direct Force Application: In a ball mill, a huge amount of energy is wasted simply lifting thousands of tons of steel balls and slurry, with much of the energy lost as heat and noise upon impact. In an HPGR, nearly all the energy from the motors and hydraulic system is applied directly to the particle bed for breakage.

Efficient Breakage Mode: Inter-particle comminution is inherently more efficient. It exploits the weakest points in the rock structure, requiring less energy to achieve the same size reduction.

Resultado: HPGR circuits can consume 20-50% less energy (measured in kWh/ton) than a traditional SAG/Ball Mill circuit to achieve the same final product size.

segundo) Generation of Micro-Cracks (Improved Grindability)

The intense pressure doesn’t just break particles; it creates a high density of micro-cracks and fractures within particles that don’t fully break.

Weakened Feed: Este “pre-weakenedmaterial is fed to the next grinding stage (often a ball mill).

Easier Downstream Grinding: The ball mill now has a much easier job. It requires less impact energy and less time to break these pre-fractured particles down to the final target size.

Resultado: This effect is a major contributor to increased throughput for the entire grinding circuit. A ball mill that previously processed 1000 tons per hour might now process 1200-1400 tons per hour of HPGR product to achieve the same grind.

For more detailed information on how HPGR equipment improve grinding efficiency, por favor haga clic aquí: https://www.zymining.com/en/a/news/how-hpgr-equipment-improves-grinding-efficiency.html

Rodillos de molienda de alta presión (HPGR), core grinding equipment in industries such as cement, minería, and metallurgy, are critical components that bear immense pressure. Sin embargo, under long-term, high-load operation, HPGR roller surface wear is an unavoidable problem. Wear not only reduces production efficiency and increases energy consumption, but can also cause downtime and significant economic losses. Effective and cost-effective roller surface repair has become a key concern within the industry.

This article provides an in-depth analysis of HPGR roller surface repair technologies, helping you select the most appropriate solution to extend equipment life and improve production efficiency.

High-pressure grinding rolls

Understanding Roller Surface Wear: Why Repair Is Necessary?

During operation, materials in a HPGR are subjected to intense compression and shearing between two counter-rotating rollers. This constant friction and impact gradually develops pits, grooves, and cracks on the roller surface. If not addressed promptly, wear will worsen, affecting material pulverization efficiency and potentially leading to roller surface spalling and serious damage to the equipment.

Roller surface repair is more than just a simplepatch.It involves restoring the roller surface’s original dimensions and wear-resistant properties through specialized processes and wear-resistant materials, enabling continued efficient and stable operation.

High-Pressure Grinding Roll Surface Repair Technology Revealed

High-pressure grinding rolls

Corrientemente, the mainstream high-pressure grinding roller (HPGR) roller surface repair technologies on the market are the following:

1. Hardfacing Repair: Precise, Durable, and Economical

Hardfacing repair is the most widely used and proven roller surface repair method. Using a heat source such as an arc or plasma, specially formulated wear-resistant alloy wire or powder is deposited onto the worn roller surface, forming a new, highly wear-resistant layer.

Technical Advantages:

High Wear Resistance: Using HPGR wear-resistant materials such as high-chromium cast iron and high-carbon, high-alloy steel, the repaired roller surface exhibits high hardness and wear resistance, extending its service life far beyond the original roller surface.

For more detailed information on high pressure grinding roller surface repair technology, por favor haga clic aquí: https://www.zymining.com/en/a/news/high-pressure-grinding-rolls-surface-repair-technology.html

Preventing a criba vibratoria lineal from clogging is a critical operational challenge. Atasco, También conocido como cegamiento (Cuando está bien, Las partículas pegajosas bloquean las aberturas) o fijación (Cuando las partículas de tamaño cercano se atascan en las aberturas), reduce severamente la eficiencia, reduce la calidad del producto, y aumenta el tiempo de inactividad para la limpieza.

Cómo evitar que la pantalla vibratoria lineal se obstruya

Cliente de cooperación

La solución rara vez es una sola solución, pero una combinación de ajustes entre el equipo., operación, y propiedades de los materiales. Aquí hay una guía completa sobre cómo evitar la obstrucción, desglosado en áreas clave.

1. Seleccione los medios de pantalla correctos (La base)

Tipo de pantalla Descripción Lo mejor para prevenir
Malla de pantalla autolimpiada Hecho de cables individuales que pueden vibrar de forma independiente, mantenidos unidos por tiras de poliuretano o de goma. El movimiento diferencial de los cables desalojó activamente partículas atrapadas. Pegging and Blinding. This is one of the most effective solutions for difficult, de tamaño cercano, o materiales ligeramente húmedos.
Ranurado (Rectangular) Malla Las aberturas son más largas de lo que son amplios. Esto proporciona un área más abierta y reduce la posibilidad de que las partículas de tamaño cercano se estancen. Pegging. Ideal for materials with elongated or flaky particles. Nota: La precisión del tamaño puede reducirse ligeramente.
Pantallas de poliuretano o de goma Estos materiales son más flexibles que el acero. Las aberturas a menudo son cónicas (Más ancho en la parte inferior), que ayuda a liberar partículas. La flexibilidad natural ayuda a "aparecer" material alojado. Pegging and high-impact applications. Excellent for abrasive or wet, materiales pegajosos.
Alambre tejido (Malla cuadrada) El estándar, pantalla de uso múltiple. Aunque efectivo para muchas aplicaciones, es el más propenso a la fijación de tamaño cercano, partículas cúbicas. Detección de uso general donde la obstrucción no es un problema importante.

2. Instalar sistemas mecánicos anti-navegación

Estos son dispositivos agregados a la cubierta de pantalla para borrar activamente la malla durante la operación.

Bolas rebotando / Anillos deslizantes:

Cómo funciona: Rubber balls or polyurethane rings are placed in a compartment beneath the screen mesh. La vibración de la pantalla hace que reboten o se deslicen, constantemente golpeando la parte inferior de la pantalla. Este impacto desalojan las partículas que están vinculadas o cegadas.

Mejor para: Seco, Materiales granulares de tamaños finos a medianos.

Sistemas de desbordación ultrasónica:

Cómo funciona: A transducer applies high-frequency, vibración de baja amplitud directamente a la malla de pantalla. Esta "microvibración" rompe la tensión superficial y los enlaces estáticos entre las partículas y los cables de la pantalla, evitar que los polvos finos cegen la malla.

Mejor para: Very fine, seco, o polvos propensos estáticos (p.ej., polvos de metal, productos farmaceuticos, los pigmentos). Este es un alto rendimiento, Pero más caro, solución.

Sistemas de cepillos rotativos:

Cómo funciona: A motorized nylon brush rotates underneath (o a veces encima de) la pantalla de la pantalla vibratoria debe estar aislada del aire, Barrilizando continuamente la malla limpia.

Mejor para: Greasy, aceitoso, o materiales fibrosos que tienden a difamarse o aglomerarse en la superficie de la pantalla.

Para obtener información más detallada sobre cómo evitar que la malla de la pantalla vibrante se obstruya, por favor haga clic aquí: https://www.hsd-industry.com/news/preventing-linear-vibrating-screen-from-clogging/

Choosing the correct mesh size for a criba vibratoria lineal is crucial for achieving the desired product separation and throughput. Los factores principales a considerar son las características del material que se está proyectando, el tamaño de separación requerido, y las capacidades de rendimiento de la pantalla vibratoria.

Cómo elegir el tamaño de la malla de una pantalla vibratoria lineal

Características de los materiales

Las propiedades del material que está detectando tienen el mayor impacto en la selección del tamaño de la malla..

Tamaño y distribución de partículas: El factor más importante. El tamaño de la malla debe corresponder al tamaño de partícula que desea separar. Use un análisis de tamiz para determinar la distribución del tamaño de partícula del material de alimentación. El tamaño de la malla debe ser ligeramente más grande que el tamaño de partícula que desea retener (el material "de gran tamaño") y ligeramente más pequeño que las partículas que desea pasar (el material "subrayado").

Contenido de humedad: Si el material está húmedo o pegajoso, puede cegar o obstruir las aberturas de pantalla. Para materiales de alta humedad, una malla más gruesa o una con un diseño especial anti-cigarrillos (Como una pantalla de poliuretano) puede ser necesario para evitar bloqueos, Incluso si una malla más fina sería ideal para la separación deseada.

Forma y densidad de partículas: Materiales con diferentes formas, como partículas planas o alargadas, puede ser más difícil de detectar y puede requerir una abertura de malla más grande para evitar que se atasquen. Los materiales más densos pueden requerir una amplitud o frecuencia de vibración diferente para garantizar una estratificación adecuada en la cubierta de la pantalla, que a su vez afecta el tamaño óptimo de la malla.

ventajas-de-pantallas-de-alta-frecuencia

Separación y rendimiento deseados

Los objetivos de su proyecto influyen directamente en el tamaño de la malla.

Precisión de detección: El nivel de precisión deseado en el producto final es clave. Si necesita una separación muy precisa, Es posible que necesite una malla más fina y una velocidad de alimentación más lenta. Esto aumenta la eficiencia pero puede disminuir la capacidad general.

La información más detallada sobre cómo elegir el tamaño de la malla de la pantalla de vibración lineal se puede encontrar aquí: https://www.hsd-industry.com/news/selection-of-mesh-size-for-linear-vibrating-screens/

To choose a Pantalla vibrante for a specific material, Debe considerar una combinación de las propiedades del material, El resultado deseado, y los requisitos operativos. El tipo de material, su distribución de tamaño de partícula, contenido de humedad, y la densidad son factores cruciales. También debe definir el rendimiento requerido (toneladas por hora), el tamaño de la separación que desea, y el nivel de precisión de detección necesaria.

Cómo elegir una pantalla vibratoria para diferentes materiales

Tamiz horizontal de una sola capa

Analice las propiedades de su material

1. Distribución del tamaño de partículas (PSD):

¿Cuál es el tamaño de la partícula más grande?? Esto determina el tamaño de apertura de alimentación y la resistencia estructural requerida.

¿Cuál es el tamaño de la partícula más pequeña?? Esto es crítico para seleccionar la apertura de la malla de pantalla.

¿Qué porcentaje del material está bien vs?. grueso? Un alto porcentaje de partículas de tamaño cercano (partículas muy cercanas al tamaño de apertura de la malla) es más difícil de pantalla y requiere más área de pantalla o un movimiento de pantalla más eficiente.

2. Forma de partícula:

Cúbico/esférico (p.ej., grava, bandear): Más fácil de la pantalla. Fluyen bien y pasan a través de las aberturas fácilmente.

Escamoso/alargado (p.ej., astillas de madera, esquisto): Difícil de detectar. Estas partículas pueden caer a lo largo a lo largo de una abertura que no encajarían de otra manera, o pueden alojarse en la malla (revestimiento). Podría ser necesaria una pantalla con una acción de lanzamiento más agresiva.

Irregular (p.ej., piedra triturada): La forma más común, con dificultad de detección moderada.

3. Densidad aparente (Peso por volumen, p.ej., lbs/ft³ o kg/m ³):

Densidad alta (p.ej., mineral de hierro): Requiere una pantalla de servicio pesado con un marco robusto, resortes más fuertes, y un motor más potente para manejar la carga.

Baja densidad (p.ej., astillas de madera, el plastico): El material puede estar en el aire si la vibración es demasiado agresiva. Una acción de detección más suave podría ser mejor.

4. Contenido de humedad:

Seco (< 1% humedad): Fácil de detectar.

Húmedo (1-5% humedad): Puede ser problemático. Las partículas finas pueden comenzar a pegarse y a la superficie de la pantalla.

Húmedo (> 5% humedad) o lechada: Este es un factor importante. La humedad alta hace que las partículas finas se adhieran a las más grandes y obstruyan la malla de la pantalla (cegador). Es posible que necesite una pantalla de desagüe especializada, barras de pulverización de agua, o una pantalla con características anti-Blinding.

Para obtener información más detallada sobre cómo elegir la pantalla vibratoria de acuerdo con diferentes materiales, por favor haga clic aquí: https://www.hsd-industry.com/news/how-to-choose-a-vibrating-screen-for-different-materials/

Cribas vibratorias lineales play a vital role in industries such as mining, quimicos, y materiales de construcción. Como componente central, El rendimiento de la pantalla afecta directamente la eficiencia de detección. Las pantallas vibratorias lineales pueden desgaste con uso a largo plazo, hacer que los procedimientos de reemplazo de pantalla adecuados crucial. Este artículo proporciona una guía detallada, Cubriendo cada paso desde la preparación de reemplazo hasta la puesta en marcha final, para ayudarlo a completar fácilmente el reemplazo de la pantalla de vibración.

Pasos de reemplazo de malla de pantalla vibratoria lineal

Cliente de cooperación

Paso 1: Preparación para el reemplazo

Antes de comenzar el proceso de reemplazo, La preparación exhaustiva garantiza un proceso suave y seguro.

Desconecte de forma segura la fuente de alimentación a la pantalla de vibración lineal y muestre una señal de advertencia para evitar un inicio accidental. Este es el paso de seguridad más crítico durante el reemplazo de la pantalla vibratoria.

Herramientas: Reúna todas las herramientas necesarias, incluyendo una llave, destornillador, martillo, tijeras o un cuchillo de utilidad, una cinta de medición, y la nueva pantalla vibratoria y las tiras de retención.

Equipo de limpieza: Use un chorro de agua o pistola de aire de alta presión para limpiar el interior de la caja de pantalla y la superficie de la pantalla para eliminar cualquier material residual y facilitar el trabajo posterior.

Paso 2: Eliminar la pantalla antigua

próximo, eliminaremos la pantalla antigua desgastada o dañada.

Aflojar las tiras de retención: Use una llave llave o destornillador para aflojar los pernos de la tira de retención uno por uno y retire las tiras de retención.

Eliminar la pantalla antigua: Retire con cuidado la pantalla anterior de la marco de la pantalla. Si la pantalla está severamente dañada, Puede tener bordes afilados; Siempre use guantes al manejar.

Se puede encontrar información más detallada sobre la guía de reemplazo de pantalla de vibración lineal aquí: https://www.hsd-industry.com/news/linear-vibrating-screen-mesh-replacement-steps/