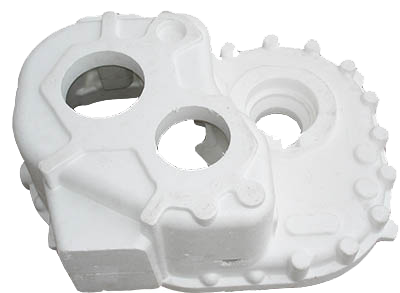
Molds are various molds and tools used in industrial production for injection molding, blow molding, extrusion, die casting or forging, smelting, stamping, etc. to obtain the desired products. In short, a mold is a tool for making a shaped article, and the tool is composed of various parts, and different molds are composed of different parts. Next, let’s take a look at the mold design and production process!
First, manufacturing preparation
Prepare the molds to be made, whether it is materials or technicians, you need to be well prepared.
Second, feasibility analysis
Feasibility analysis of the products of the designed molds, taking the automobile parts as an example, firstly, the assembly drawings of each component are analyzed by the design software, that is, the set of drawings mentioned in our work, to ensure that the drawings of the products are correct before the mold design. On the other hand, you can familiarize yourself with the importance of each component in the entire car to determine the key size, which is very beneficial in the mold design. The specific set of drawings still needs to be designed by yourself.
Third, the structure
After the product analysis, the product to be analyzed, what kind of mold structure is used for the product, and the product is sorted, the content of each process is determined, and the product is developed by using the design software. To expand forward, for example, a product requires five processes, and the stamping is completed from the product drawing to the fourth, third, second, and first projects, and a graphic is copied and then the previous project is executed. The work of starting the work of the five projects is completed, and then the detailed work is carried out. Note that this step is very important and needs to be very careful. If this step is completed well, it will save a lot of time in drawing the mold diagram. After the stamping content of each project is determined, including in the forming mold, the inner and outer lines of the thickness of the product material are retained to determine the size of the convex and concave molds. The method for product unfolding is not described here, and will be in the product unfolding method. Specific introduction.
Fourth, preparation materials
According to the product development drawing, the template size is determined in the drawings, including the fixed plate, the unloading plate, the convex and concave mold, the insert, etc., pay attention to directly preparing the material in the product development drawing, which is of great benefit to the drawing mold drawing. I have seen that many mold designers directly calculate the product development drawings by hand. This method is too inefficient, draw the template size directly on the drawing, and express it in the form of a group diagram. The preparation of the material is completed, and on the other hand, a lot of work is saved in the work of the various parts of the mold, because in the work of drawing each component, it is only necessary to add the positioning, the pin, the guide post and the screw hole in the preparation drawing.
Fifth, draw drawings
After the preparation is completed, the mold drawing can be fully entered, and a copy can be made in the preparation drawing to draw the components, such as adding screw holes, guide post holes, positioning holes, etc., and in the punching die. The hole for each hole needs to be cut by the wire. In the forming die, the forming gap of the upper and lower molds must not be forgotten, so the mold drawing of one product after the completion of these work is almost completed 80%, and the process of drawing the mold drawing is also completed. Need to pay attention to: each process, refers to the production, such as the fitter scribing, wire cutting, etc. to the different processing steps have a complete production of the layer, which has great benefits for wire cutting and drawing management, such as color distinction, etc., size The labeling is also a very important job, but also a troublesome job, because it is too time consuming.
Sixth, proofreading
After the above drawings are completed, the drawings cannot be issued. It is also necessary to proofread the mold drawings, assemble all the accessories, make different layers for each different mold plate, and use the same reference as the guide post holes to perform the mold. Analyze the analysis and insert the product development drawings into the group diagrams to ensure that the hole positions of the template are consistent and the gap between the upper and lower molds of the bending position is correct.
Seven, production
During the production process, pay attention to check the glue position and check whether the glue position is uniform. If it is uneven, it will cause shrinkage and affect the appearance.
Eight, open the mold direction
Determine the parting surface and the draft angle
1. The parting surface selects the value projected in the mold opening direction and is as simple as possible.
2. Touching the position: Try to touch the back mold as much as possible. If you want to touch the front mold, it is easy to walk the front, affect the appearance, and use the plane contact.
3. Pillow: Pillow 5-8 mm, and then flat with the large part, the plastic part is pulled 3 degrees, the back is pulled 3 degrees or avoiding the air.
4. Insert the position: use the side work, pull 3 degrees, generally do inserts.
The above is the entire content of the mold design and manufacturing process. In general, the mold design and production process is mainly preparation preparation, production feasibility analysis and production design structure, preparation of production materials, drawing production drawings, and then in detail Proofreading, to ensure that the production is started after the error is correct, it is also necessary to pay attention to the direction of demoulding when demolding.


